We were hoping to make a late December getaway to the Bahamas since November was preempted by some return trips to visit and support family, but on December 26th I was paid a visit by the kidney stone fairy. I’m very glad we weren’t in the Bahamas as this was my first time dealing with one of these. On the pain scale of one to ten I’d give that experience a 12…..I was told by the doctor that I had two more waiting in the wings so we thought it might be a good idea to take this opportunity to fix some things that we had been putting off while we were staying put for a while.
We had a few projects……..Our watermaker had stopped working in the Bahamas, and that required diagnosis and repair…..we had some wood work that needed repair from some very old water damage,……our alternator needed a rebuild and realignment……the adjacent engine driven, high pressure watermaker pump also needed to be realigned……our refrigerator and freezer compressor had originally been wired in the same circuit which I thought was interfering with the performance when both units tried to start up at the same time,….. our wifi range extender was on the fritz,…… our new outboard was due for it’s ten hour service and our backup, new to us, outboard needed some work as well, and our masthead wind instruments (which supply the wind speed and direction to our instruments) stopped sending data to our cockpit display for some reason and finally our refrigerator evaporator plate needed to be replaced. Keep in mind these projects were tempered by trips to the beach, happy hours and visiting friends !!!!
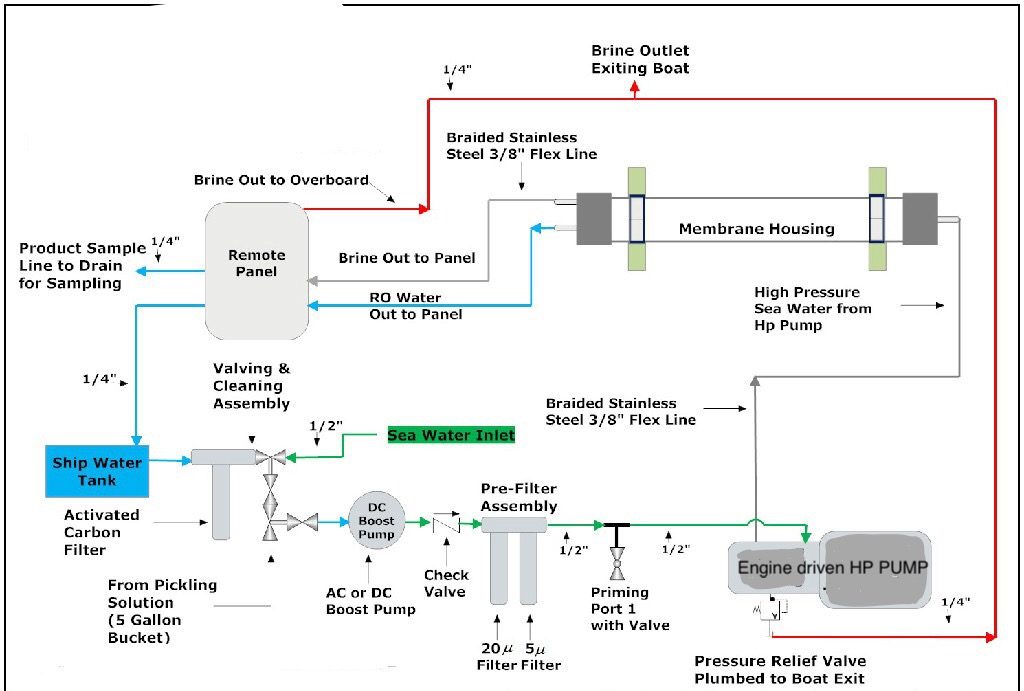
First a quick tutorial on watermaker function. We take in seawater and filter it to remove any large contaminants. Then the water is pressurized using a “low pressure” pump at about 17psi. That pump maintains the pressure to the high pressure pump which operates at hundreds of pounds of pressure. The water then travels through two tubular membranes (filters). The seawater is highly pressurized and travels along the outside of the membrane and the freshwater is pushed through to the inside of the membrane “cylinder”. That freshwater goes to our tanks and the remaining briny seawater goes overboard. Sounds simple right ? Here’s a diagram ……
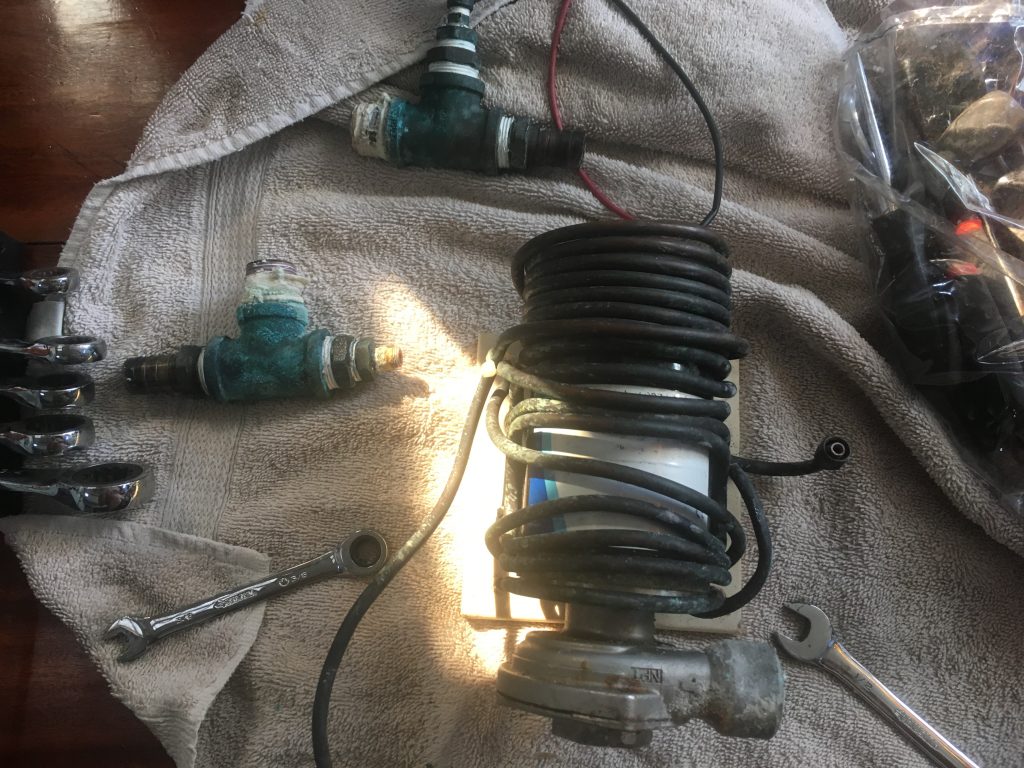
Our watermaker was a two fold issue. Our low pressure pump, which feeds the high pressure pump wasn’t moving any water. It is an intermittent duty (i.e. 30 minutes on and 30 minutes off) pump and required a cooling coil to keep the temperature down and extend the duty cycle. Unfortunately, the cooling coil couldn’t make 100% contact with the motor so it suffered from some efficiency issues.
I had initially assumed that the motor was burned up. I removed the pump and was about to order a new one. I had hoped there had been some advancement in pump design and we could get a continuous duty pump, but apparently there haven’t been any advancements in this type of pump design. I thought we were destined to replace the pump for $395. As I was taking the pump to the trash, I decided to try something and I attached the leads to the battery in our van and the pump ran !! So, I found a local pump repair shop and got it rebuilt for $65…although, it took over two weeks to get the parts.
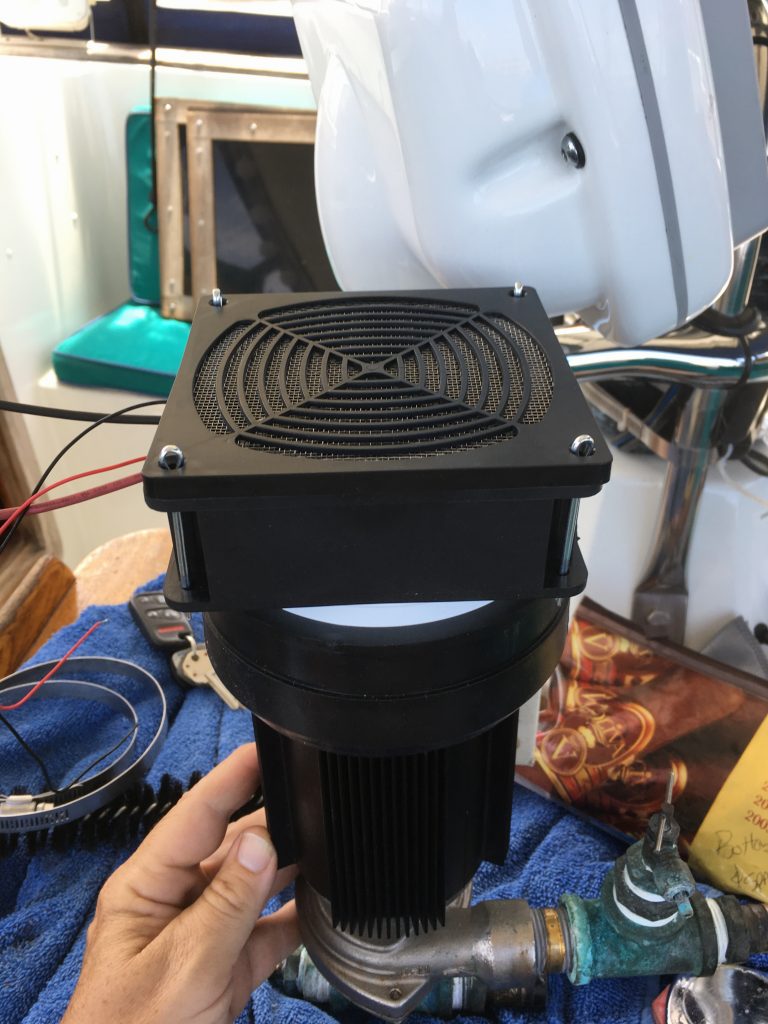
Once the pump was rebuilt I began to investigate other ways to cool the pump and extend the duty cycle. I discovered that Shur Flo pumps makes a 5″ heat sink that fits the motors on a variety of other manufacturers pumps. I get the feeling the motors are all made by the same company and relabeled for the “manufacturers”. I consulted with a friend who was an aerospace engineer for ideas in cooling the pump motor and he recommended “Thermal Grease” under the heat sink. This makes the contact between the sink and the motor housing 100% by removing air gaps and the grease has metal particles in it to transmit heat more efficiently.
http://www.steam-brite.com/shurflo-34007-heat-sink-cover-inch-continuous-pump-longer-life-cool-clip-p-11287.html
I added a 138cfm cooling fan like you’d have on a large computer and fabricated a support from a PVC bus hub and a rubber reducer coupling and ended up with this …..we flushed the system and the motor was as cool as a cucumber !!!
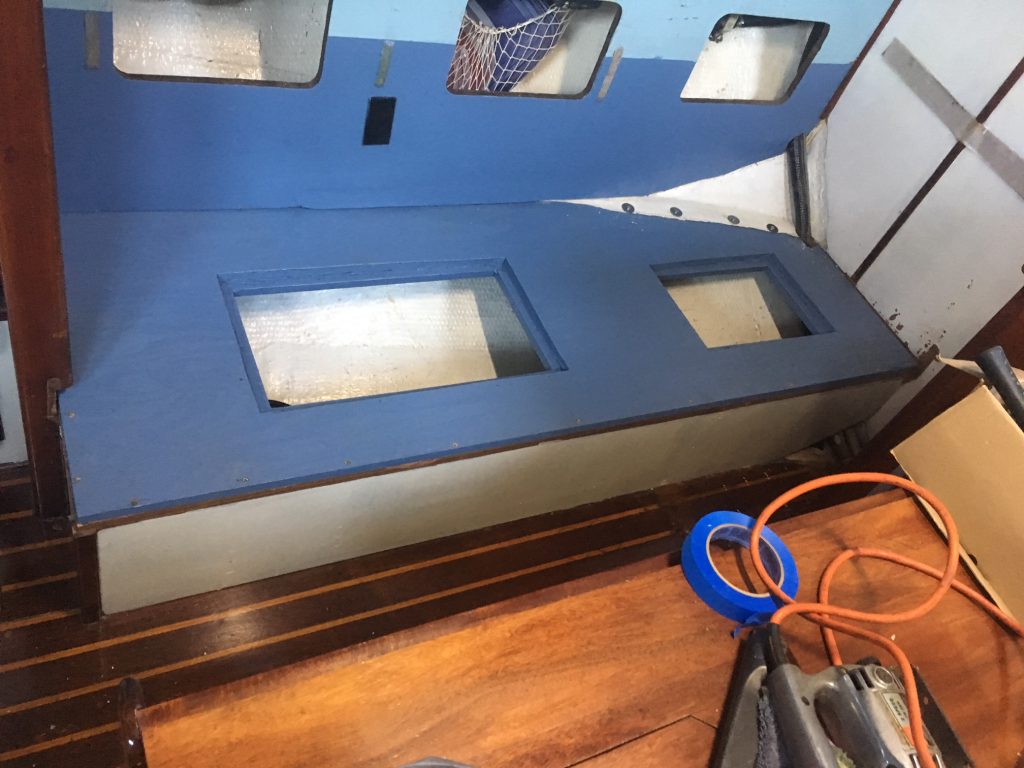
The “woodwork” turned into tearing out 60% of our port settee and replacing the entire seat and a small section of the outboard bulkhead that separates the storage area. I used marine grade plywood and treated it with Copper Coat which is a 9% copper solution that prevents future mold, mildew, rot and insect infestation. I also increased the size of the access hatches so we can store dive tanks under the settee. The biggest challenge was matching the shape of the board that was glassed into that area which would not come out in one piece…or even six !! A lot of the outer edge had to be ground out of the fiberglass. I took this opportunity to run some extra 0 gauge wire forward for the addition of some electrical items down the road. I was tempted to remove the washing machine during this process, but decided we could do that later.
Next time…alternator….masthead instruments…..pump alignment….fridge/freezer…..etc….etc….etc
Amazon eGift Card - Greetings - (Instant Email or Text Delivery)
$50.00 (as of December 12, 2025 20:05 GMT +00:00 - More infoProduct prices and availability are accurate as of the date/time indicated and are subject to change. Any price and availability information displayed on [relevant Amazon Site(s), as applicable] at the time of purchase will apply to the purchase of this product.)Amazon Echo Dot Kids (newest model) - Designed for kids, with Alexa+ Early Access, parental controls, Includes 1 Year of Amazon Kids+, Stardust
$31.99 (as of December 12, 2025 20:14 GMT +00:00 - More infoProduct prices and availability are accurate as of the date/time indicated and are subject to change. Any price and availability information displayed on [relevant Amazon Site(s), as applicable] at the time of purchase will apply to the purchase of this product.)Blink Mini 2 — Home Security & Pet Camera with HD video, color night view, motion detection, two-way audio, and built-in spotlight — 1 camera (White)
$17.99 (as of December 12, 2025 20:14 GMT +00:00 - More infoProduct prices and availability are accurate as of the date/time indicated and are subject to change. Any price and availability information displayed on [relevant Amazon Site(s), as applicable] at the time of purchase will apply to the purchase of this product.)Amazon Fire HD 10 Kids Pro tablet (newest model) ages 6-12. Bright 10.1" HD screen, includes ad-free content, robust parental controls, 13-hr battery and slim case for older kids, 32 GB, Nebula
$189.99 (as of December 12, 2025 20:14 GMT +00:00 - More infoProduct prices and availability are accurate as of the date/time indicated and are subject to change. Any price and availability information displayed on [relevant Amazon Site(s), as applicable] at the time of purchase will apply to the purchase of this product.)Roblox $50 Physical Gift Card [Includes Free Virtual Item] [Redeem Worldwide]
$50.00 (as of December 12, 2025 20:05 GMT +00:00 - More infoProduct prices and availability are accurate as of the date/time indicated and are subject to change. Any price and availability information displayed on [relevant Amazon Site(s), as applicable] at the time of purchase will apply to the purchase of this product.)Auto Amazon Links: No products found.
