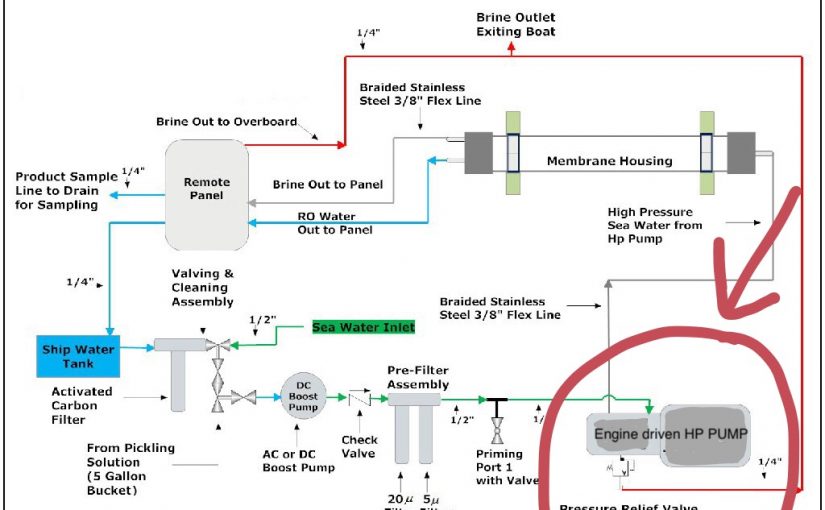
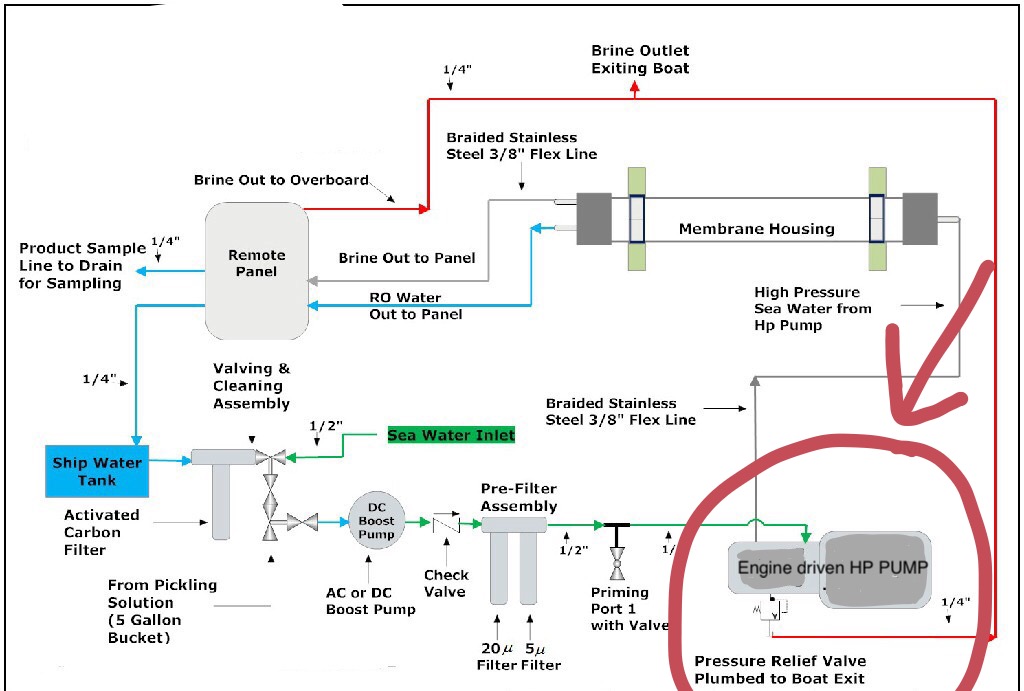
Purely for clarification purposes …..here’s a diagram of what our watermaker system is like….our current issue is the high pressure pump.
As you may, or may not recall, last year we had to replace our watermaker membranes. Prior to that, I had to rebuild our low pressure pump and design a new cooling system.
A lot of people ask “How do you make drinking water from seawater?”
The answer is astonishingly simple, even though the design of the system is somewhat complicated. Here’s the secret…..
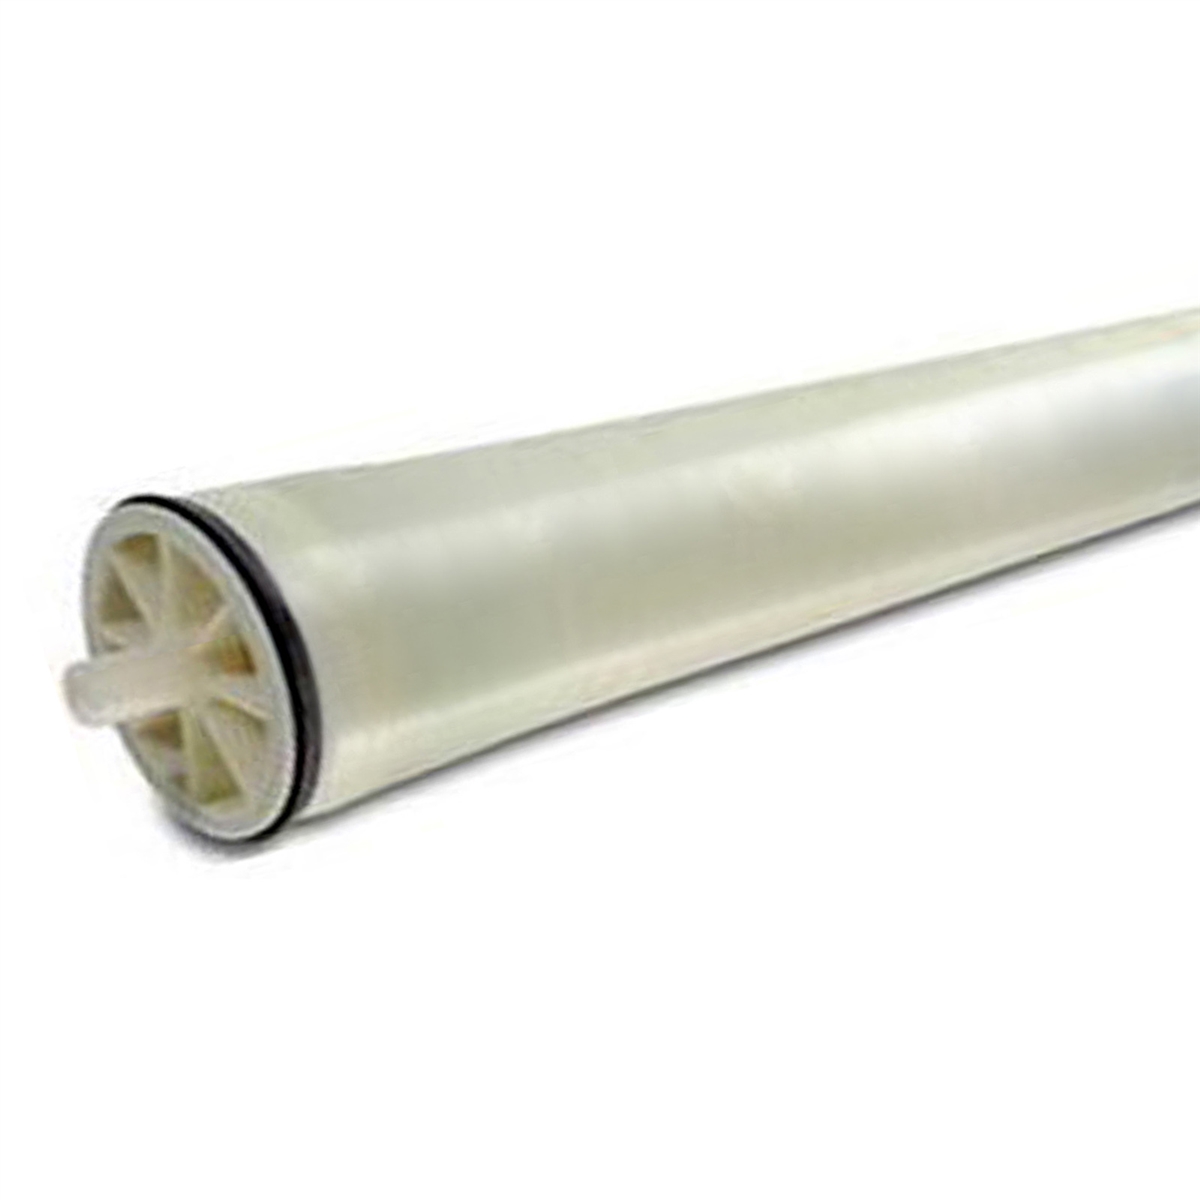
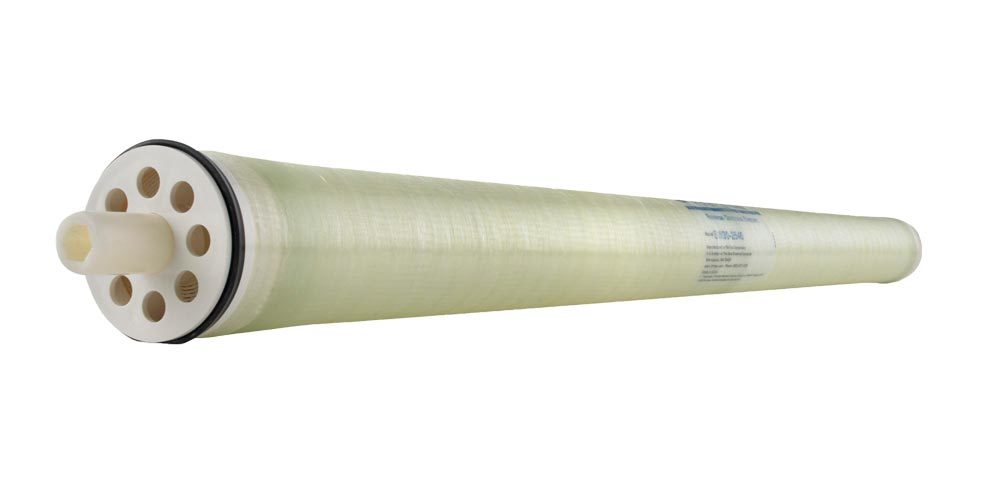
If you remember the membrane post, those membranes are some nifty little 40” long cylinders made by Dow Chemical, and when you place seawater under about 800psi, inside a housing, the water molecules are forced through the membranes and the salt molecules stay on the other side and can be discarded/flushed overboard. Many islands in the Caribbean, and elsewhere, use industrial scale water makers, the membranes come in a large variety of sizes, for domestic fresh water production. Some of these units make thousands or tens of thousands of gallons per day. Our watermaker is capable of making 50 gallons per hour. Dow also makes versions for brackish water and other types of contaminated water.
Here’s what the membranes look like in the wild……(outside the housing)….
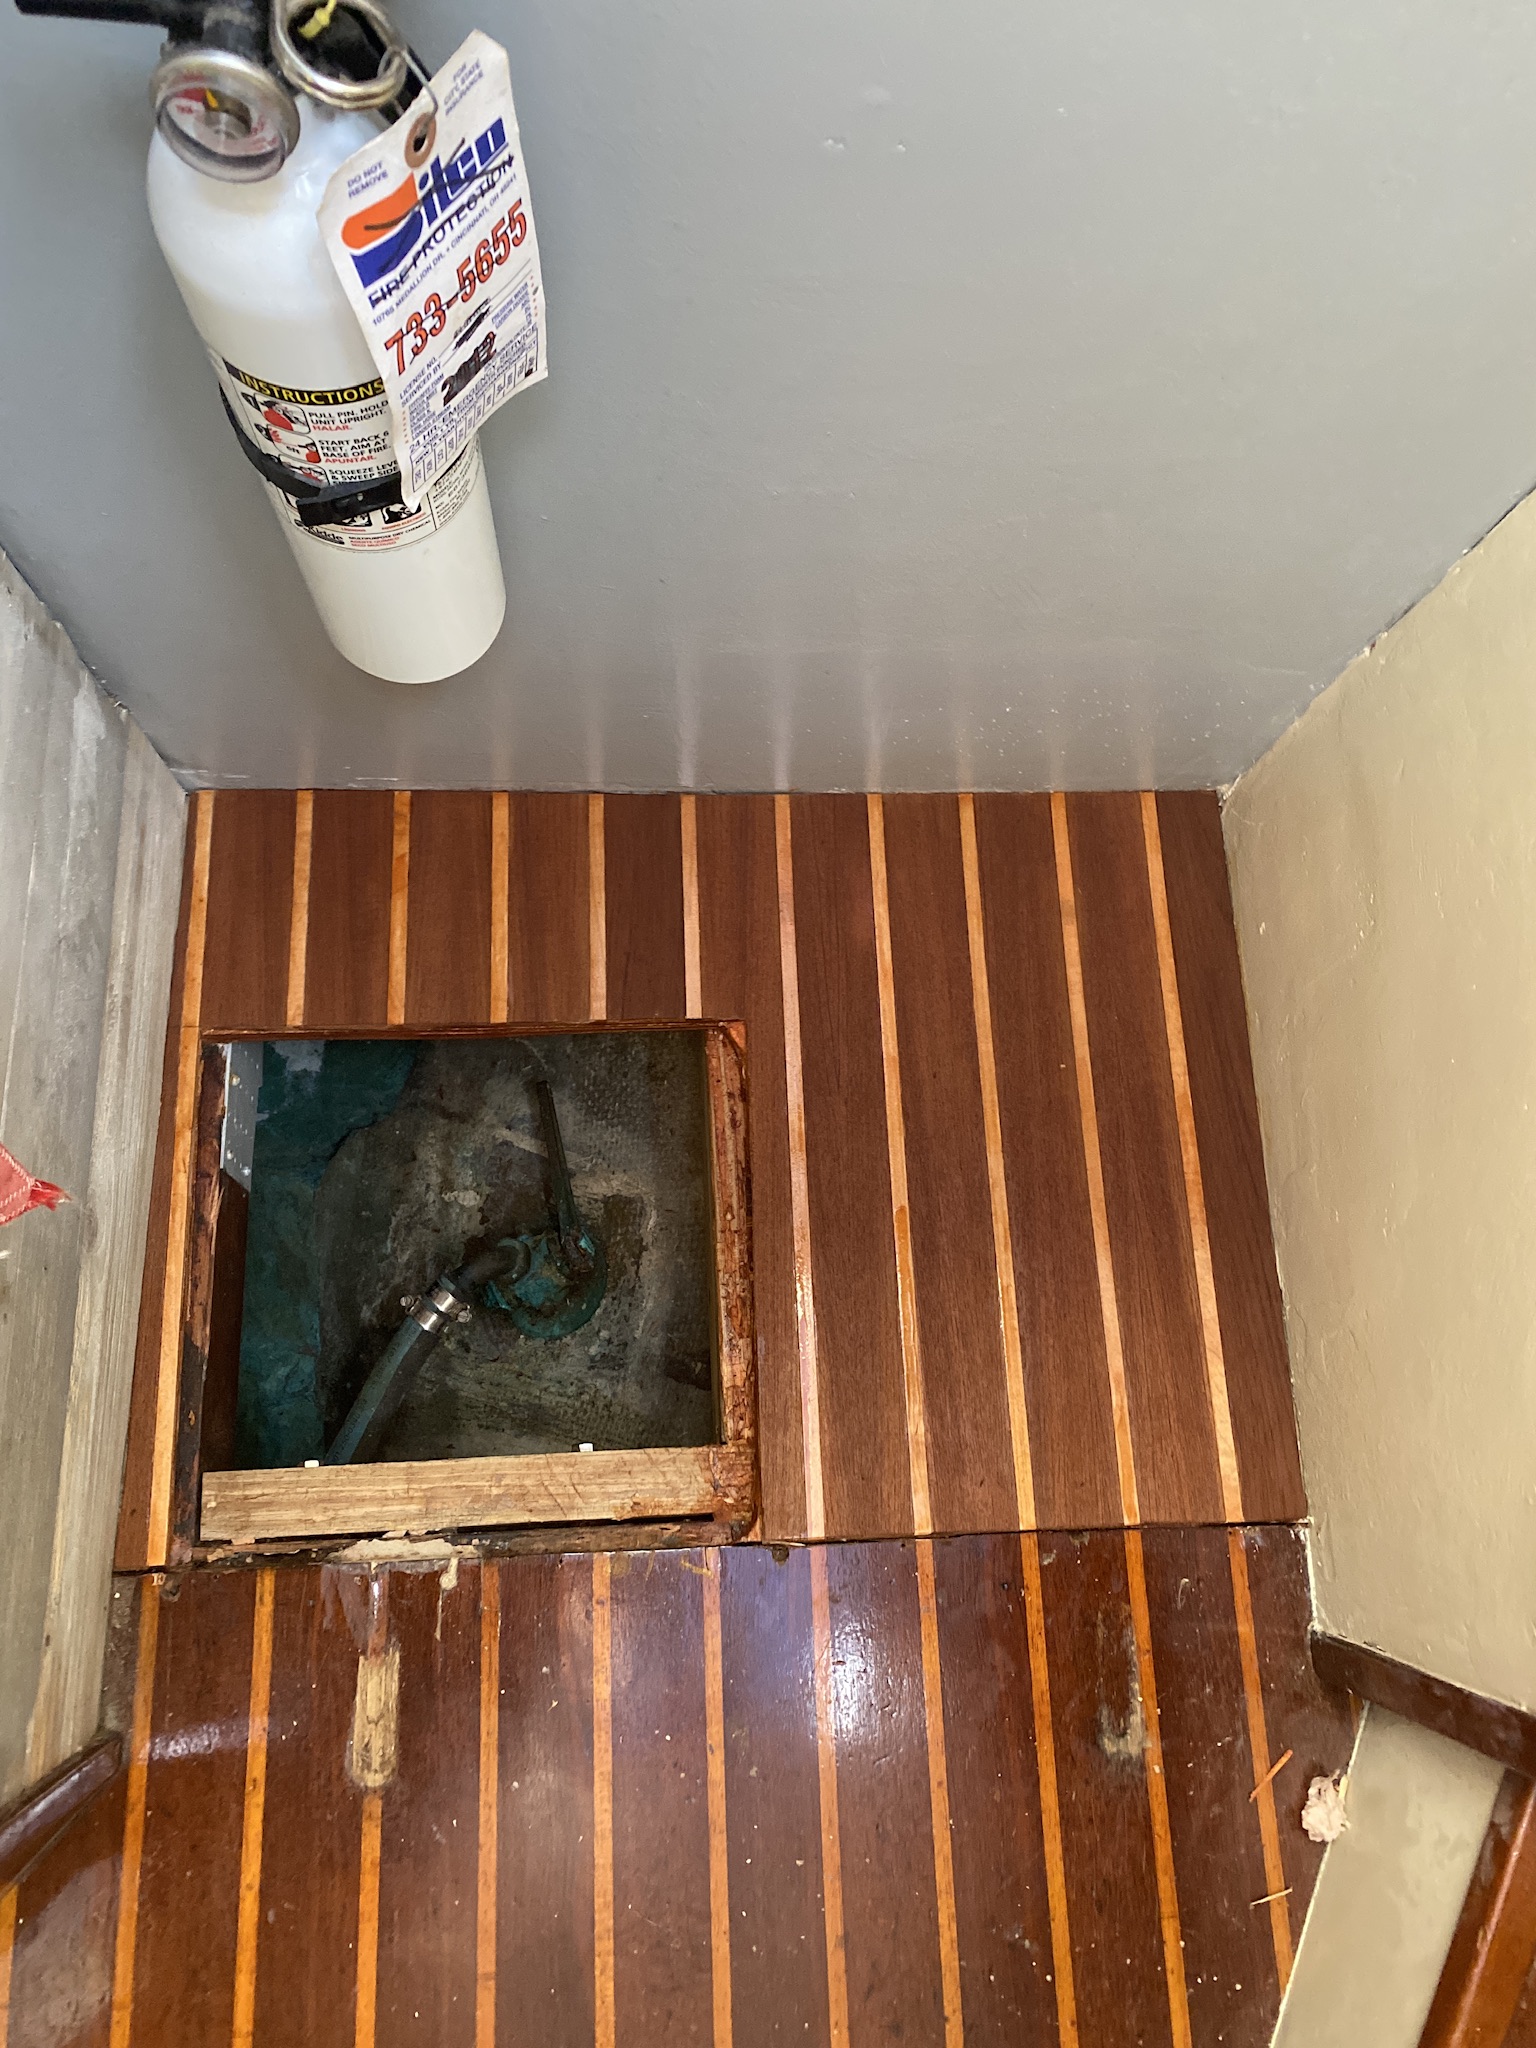
Our current issue was that our high pressure pump (circled in the above diagram in red) was leaking, despite a recent rebuild. As it turns out, this pump ….(you can see the salt residue where it was leaking….)
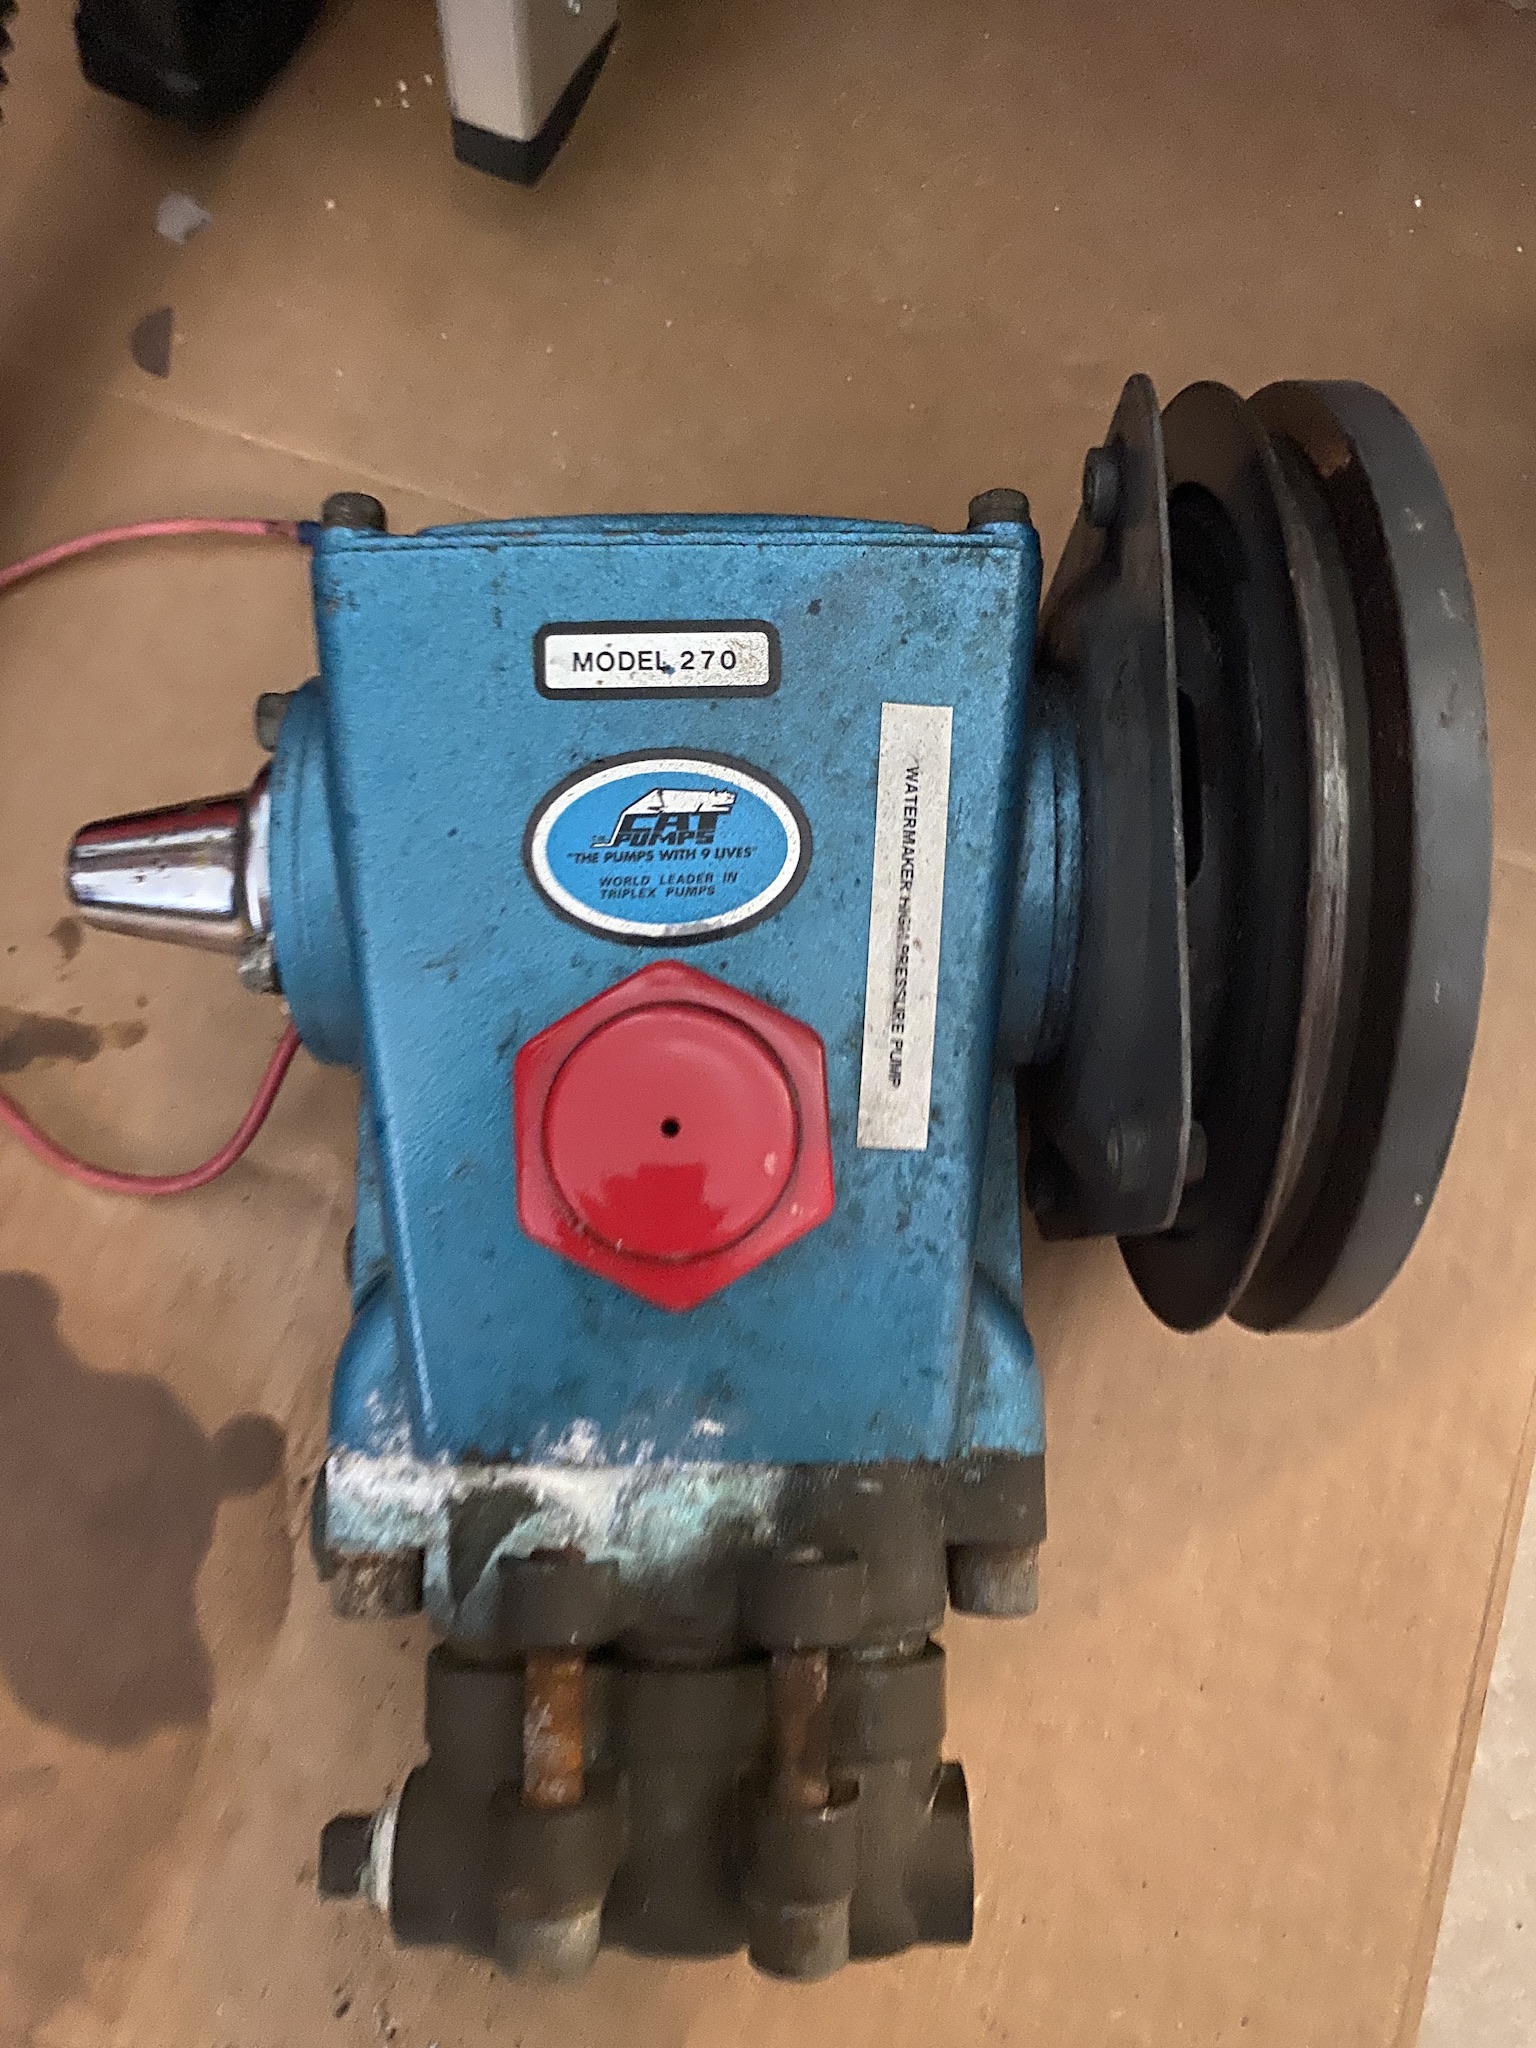
is NOT designed for use with salt water…..which is kind of an important feature for a seawater to drinking water conversion system. This pump is designed for use in industrial fresh water pressure washing …..like in a car wash.
So, I had to research a new pump…..this one…..
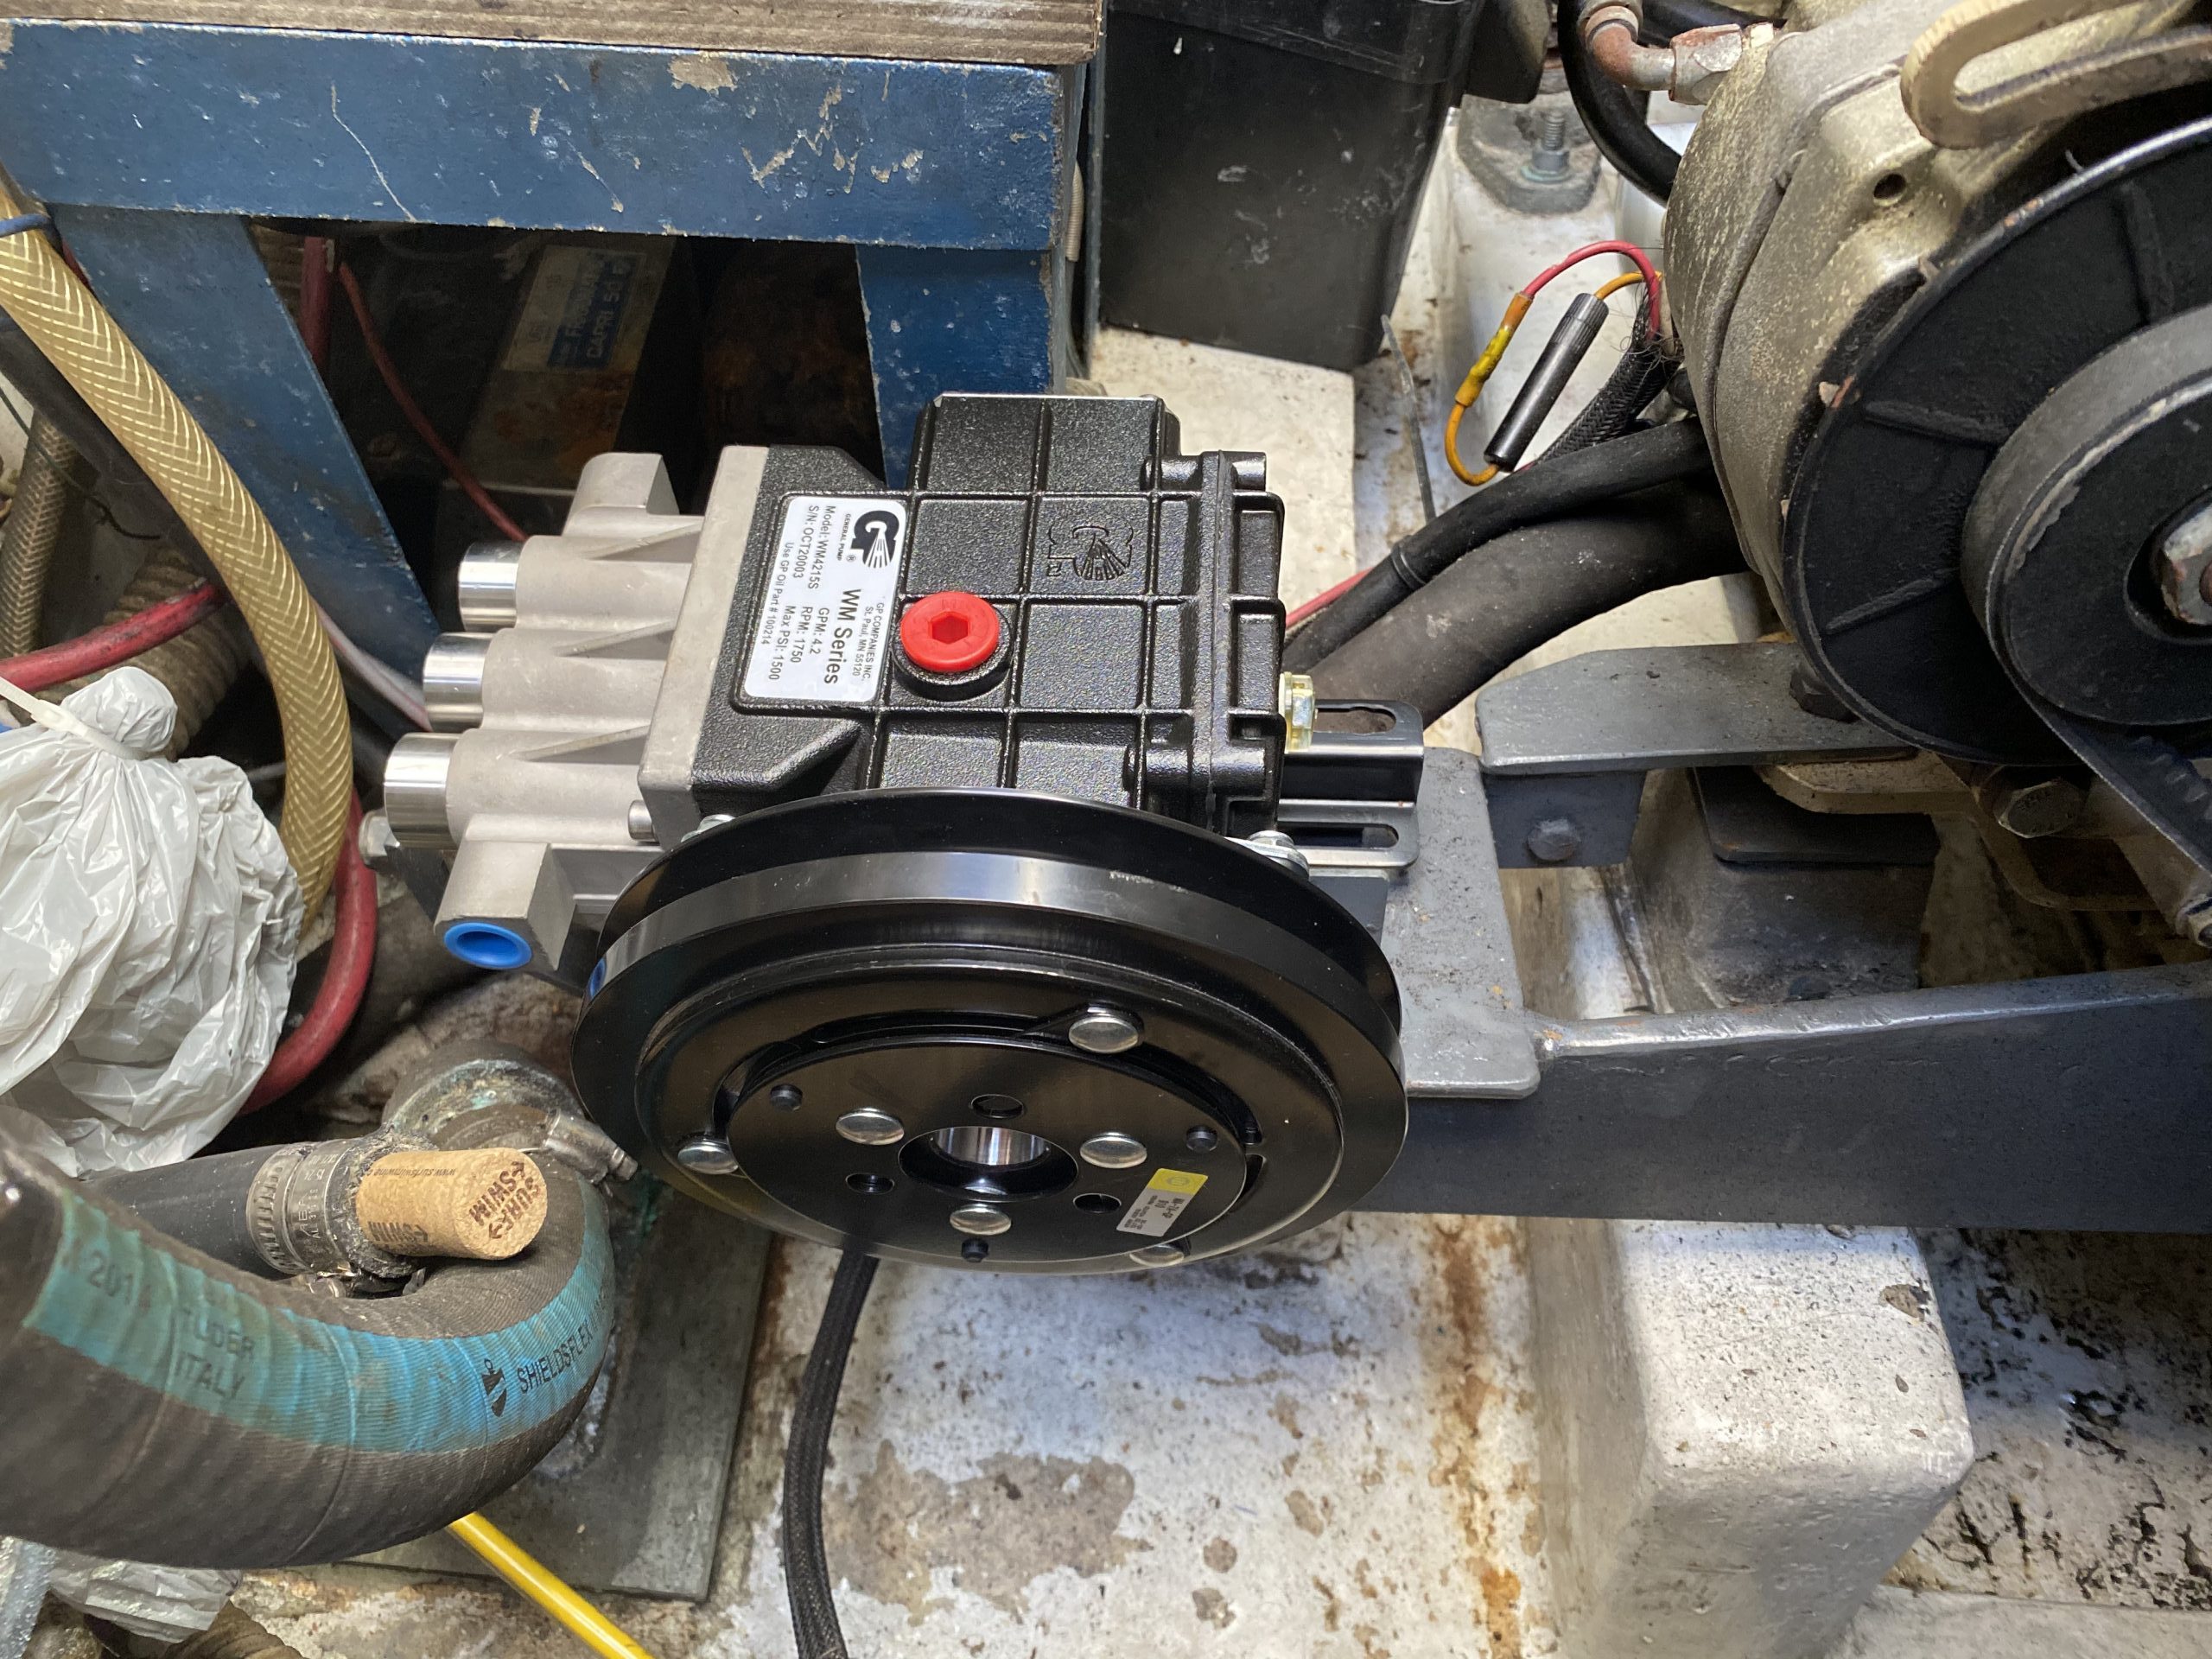
A little pro tip…..if you need a pump for any application always check with the online company Kleen-Rite….. (https://www.kleen-ritecorp.com) even people who work in the pump repair and supply industry have trouble figuring out how they get their prices so low…..but it’s an advantage for the DIY’ers……
I saved about $1,000 by ordering it through them. It required a little more phone time, talking to them and General Pump, the manufacturer, to get the configuration correct but it was totally worth it. General Pump even installed the electric clutch and pulley at no charge. https://www.generalpump.com
Now the issue is getting a different pump to mount in the same place as the old pump. I’ve been working on fabricating a bracket that will adapt the old mount to the new pump…….but that’s for next time…..

Apple Gift Card - App Store, iTunes, iPhone, iPad, AirPods, MacBook, accessories and more (eGift)
(as of July 7, 2026 06:54 GMT +00:00 - More infoProduct prices and availability are accurate as of the date/time indicated and are subject to change. Any price and availability information displayed on [relevant Amazon Site(s), as applicable] at the time of purchase will apply to the purchase of this product.)
Amazon eGift Card | Birthday
(as of July 7, 2026 06:54 GMT +00:00 - More infoProduct prices and availability are accurate as of the date/time indicated and are subject to change. Any price and availability information displayed on [relevant Amazon Site(s), as applicable] at the time of purchase will apply to the purchase of this product.)
Amazon Physical Gift Card | Celebration
(as of July 7, 2026 06:54 GMT +00:00 - More infoProduct prices and availability are accurate as of the date/time indicated and are subject to change. Any price and availability information displayed on [relevant Amazon Site(s), as applicable] at the time of purchase will apply to the purchase of this product.)
Ring Indoor Cam Plus (newest model), Home or business security, Retinal 2K for crisp, true-to-life video quality, 4x Enhanced Zoom, Low-Light Sight, 2-pack, White
(as of July 7, 2026 06:54 GMT +00:00 - More infoProduct prices and availability are accurate as of the date/time indicated and are subject to change. Any price and availability information displayed on [relevant Amazon Site(s), as applicable] at the time of purchase will apply to the purchase of this product.)
Ring Outdoor Cam Plus, Battery (newest model), Home or business security, Wide-Angle 2K Video with Ring Vision, Low-Light Sight for full-color night vision, Mount-Anywhere Versatility, White
(as of July 7, 2026 06:54 GMT +00:00 - More infoProduct prices and availability are accurate as of the date/time indicated and are subject to change. Any price and availability information displayed on [relevant Amazon Site(s), as applicable] at the time of purchase will apply to the purchase of this product.)Auto Amazon Links: No products found.