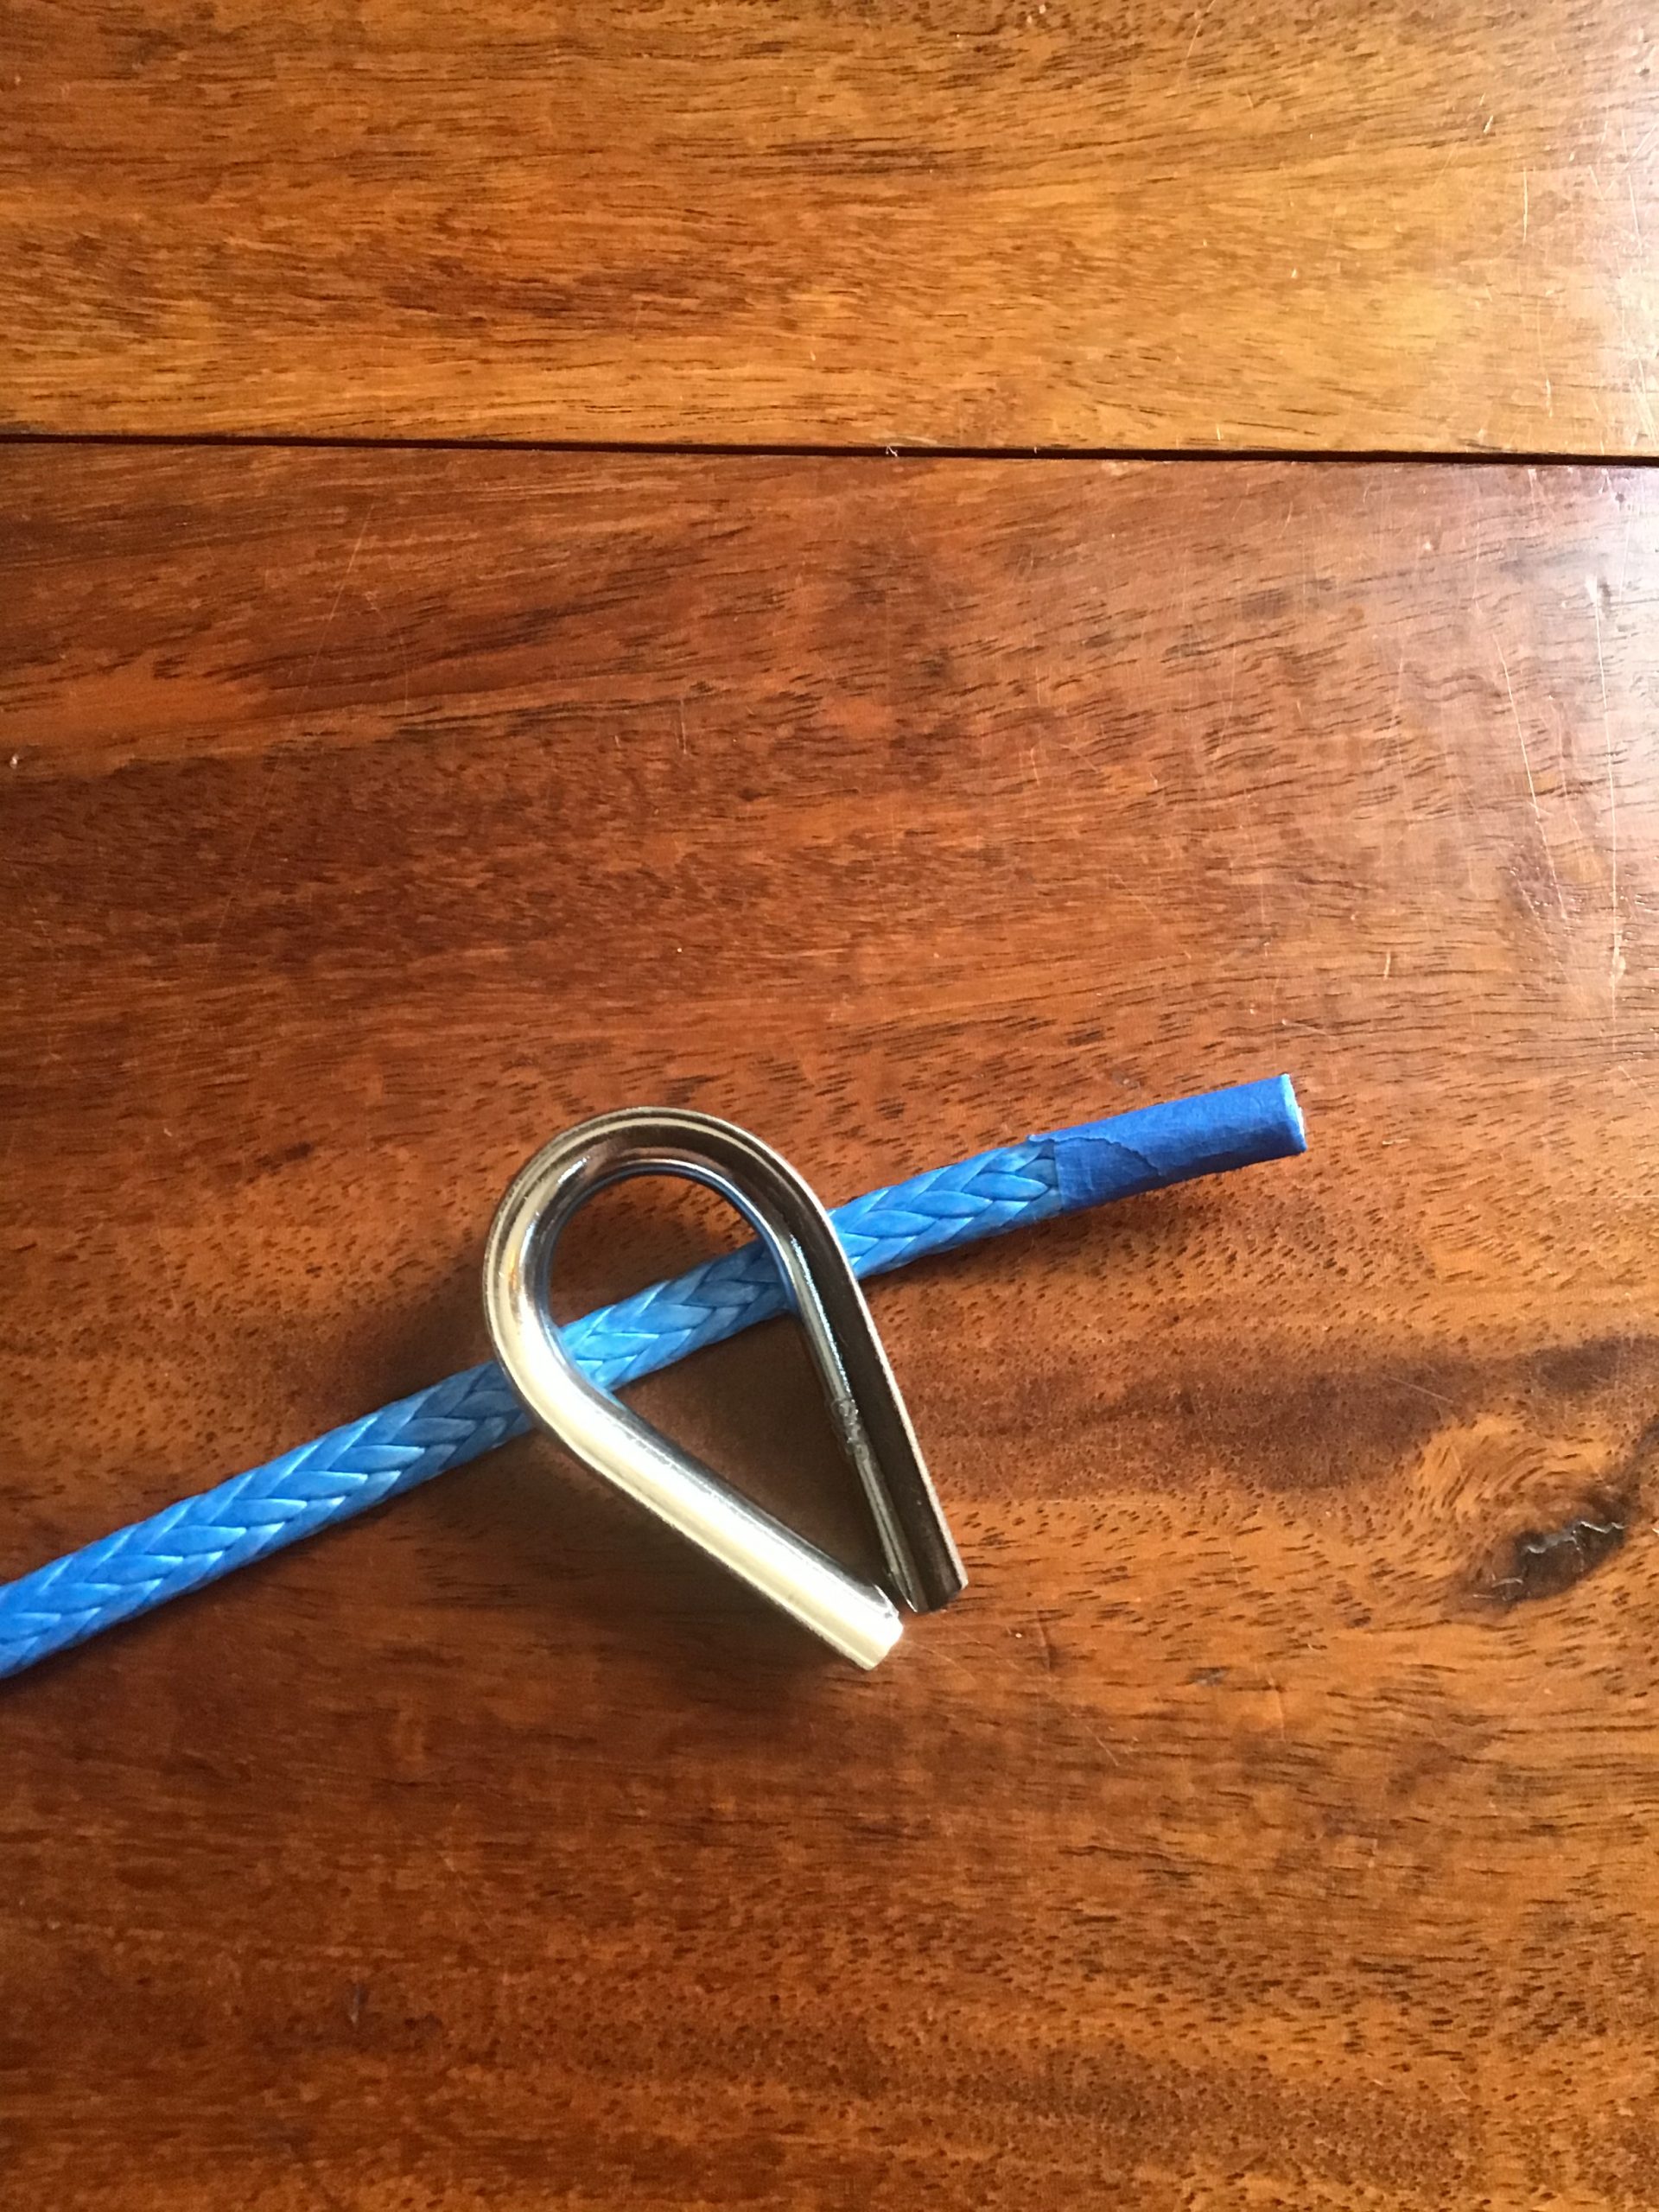
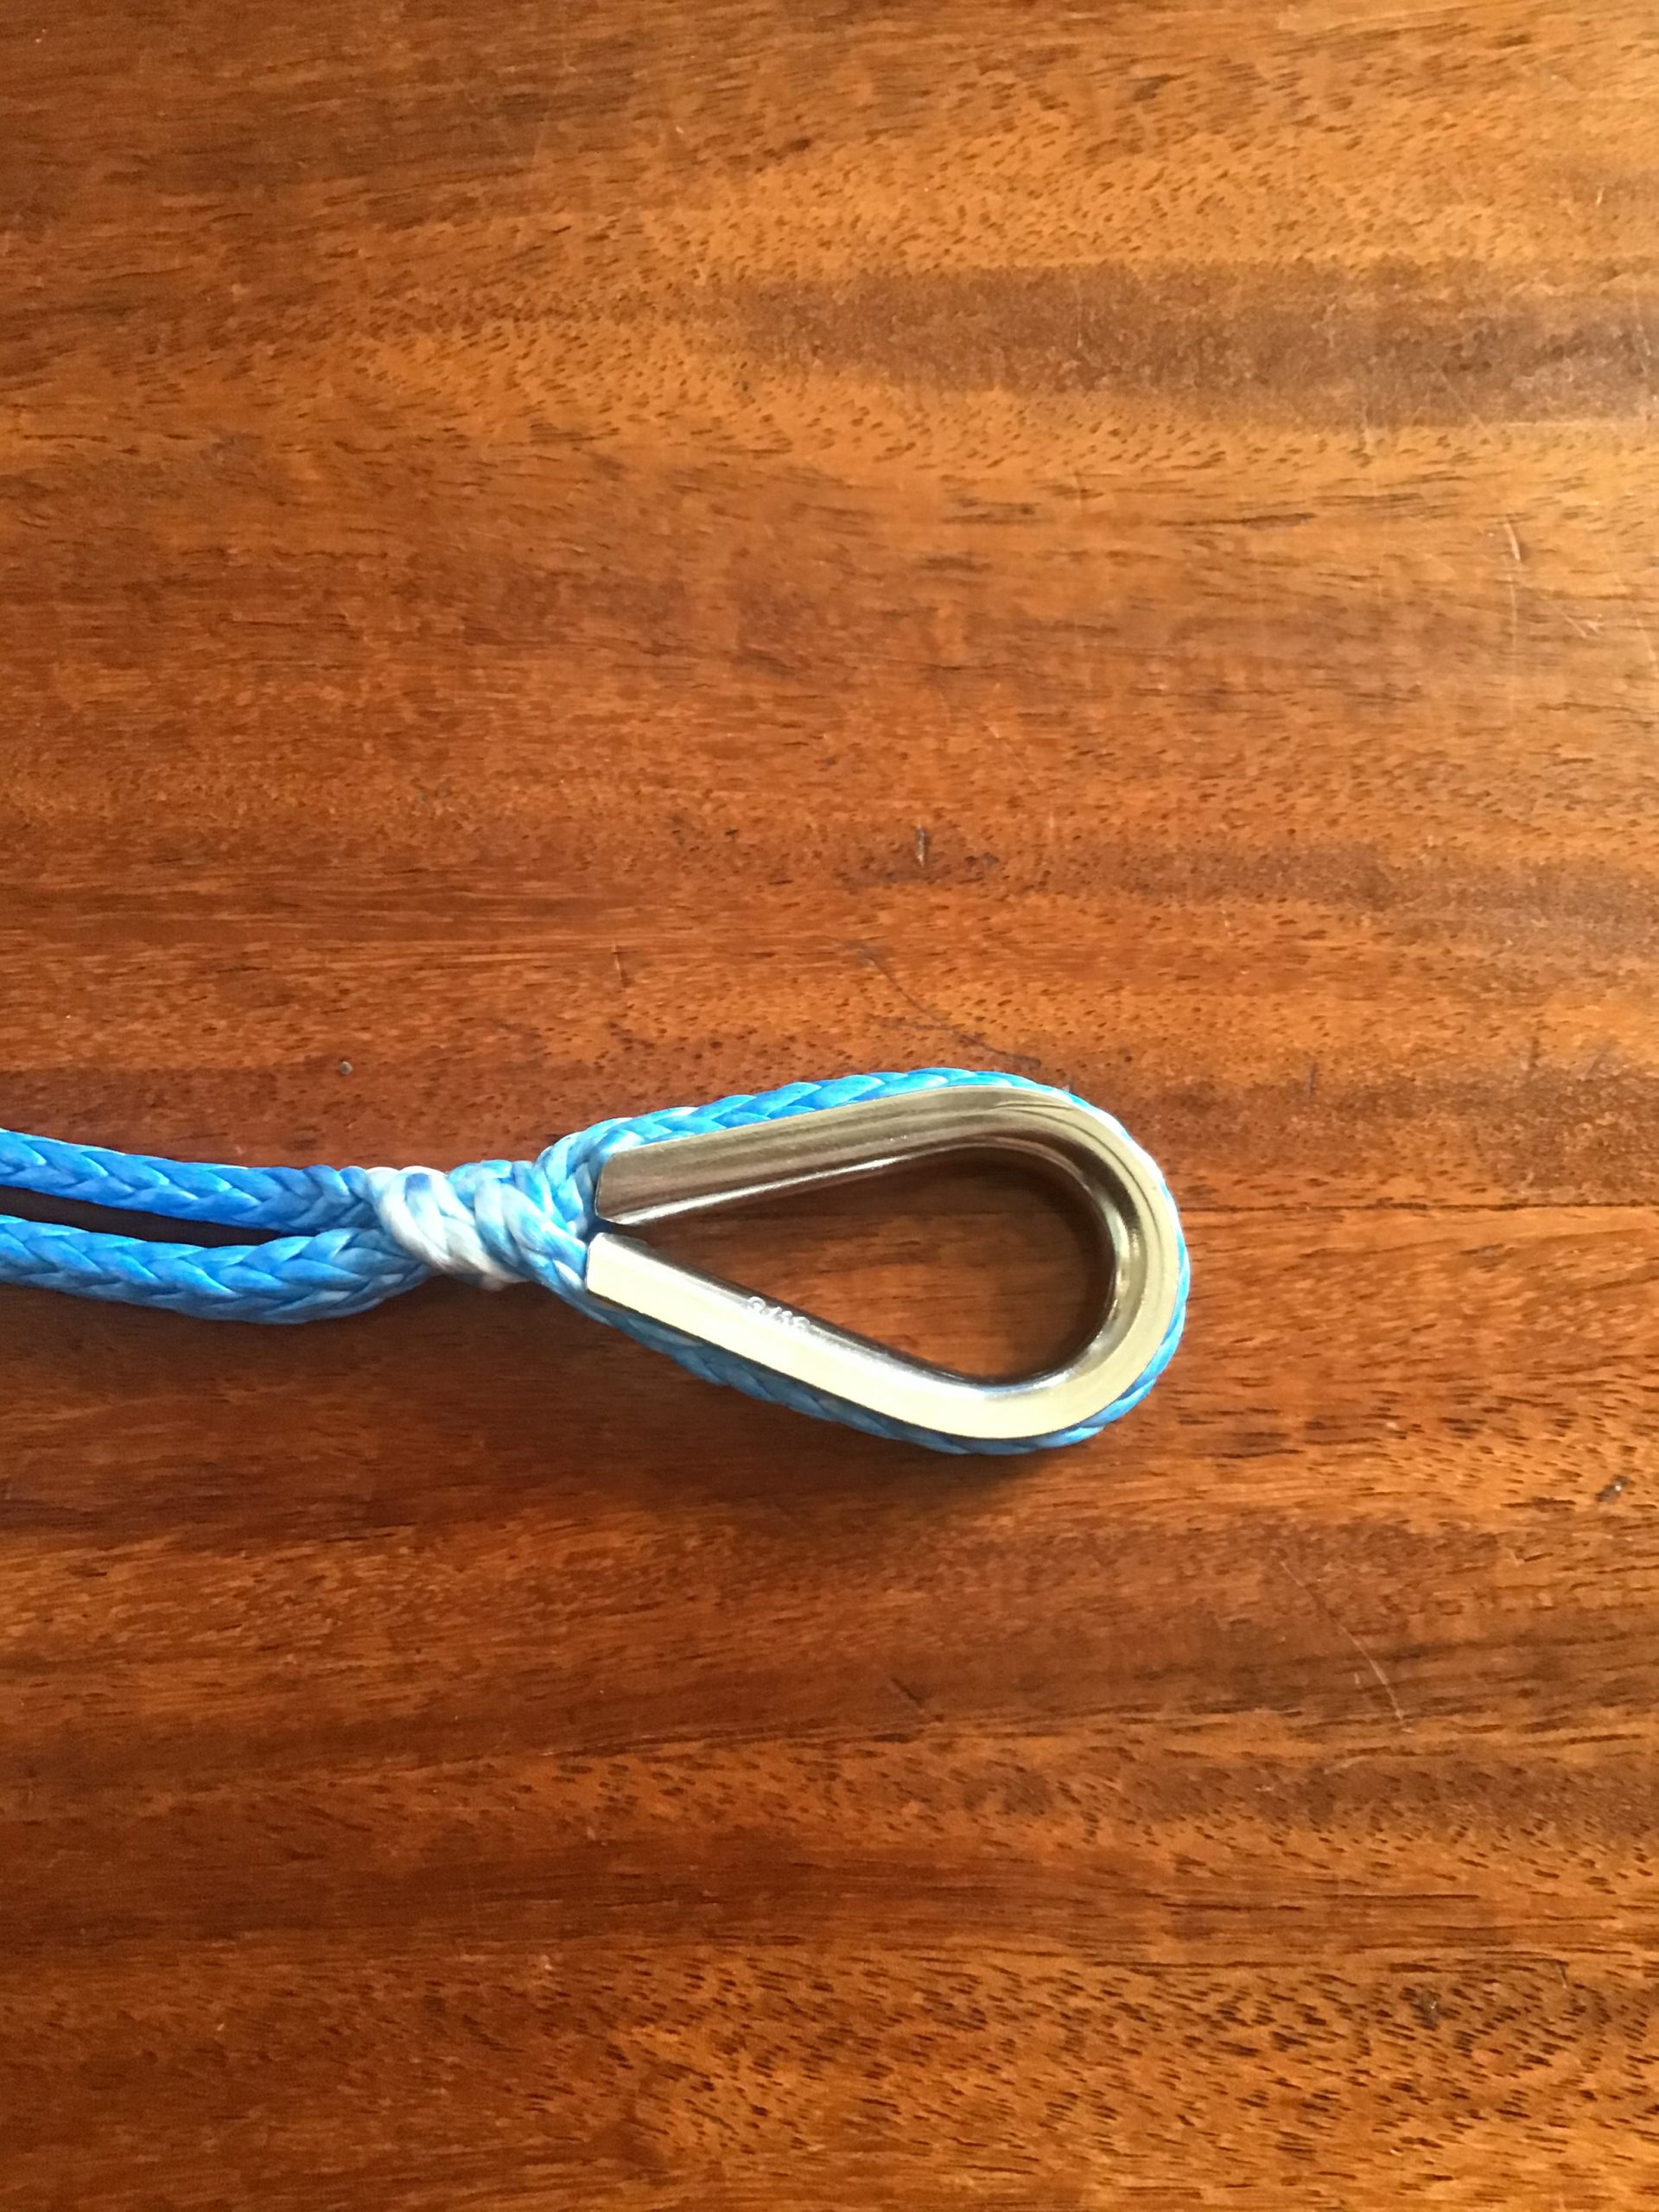
How to turn this…..
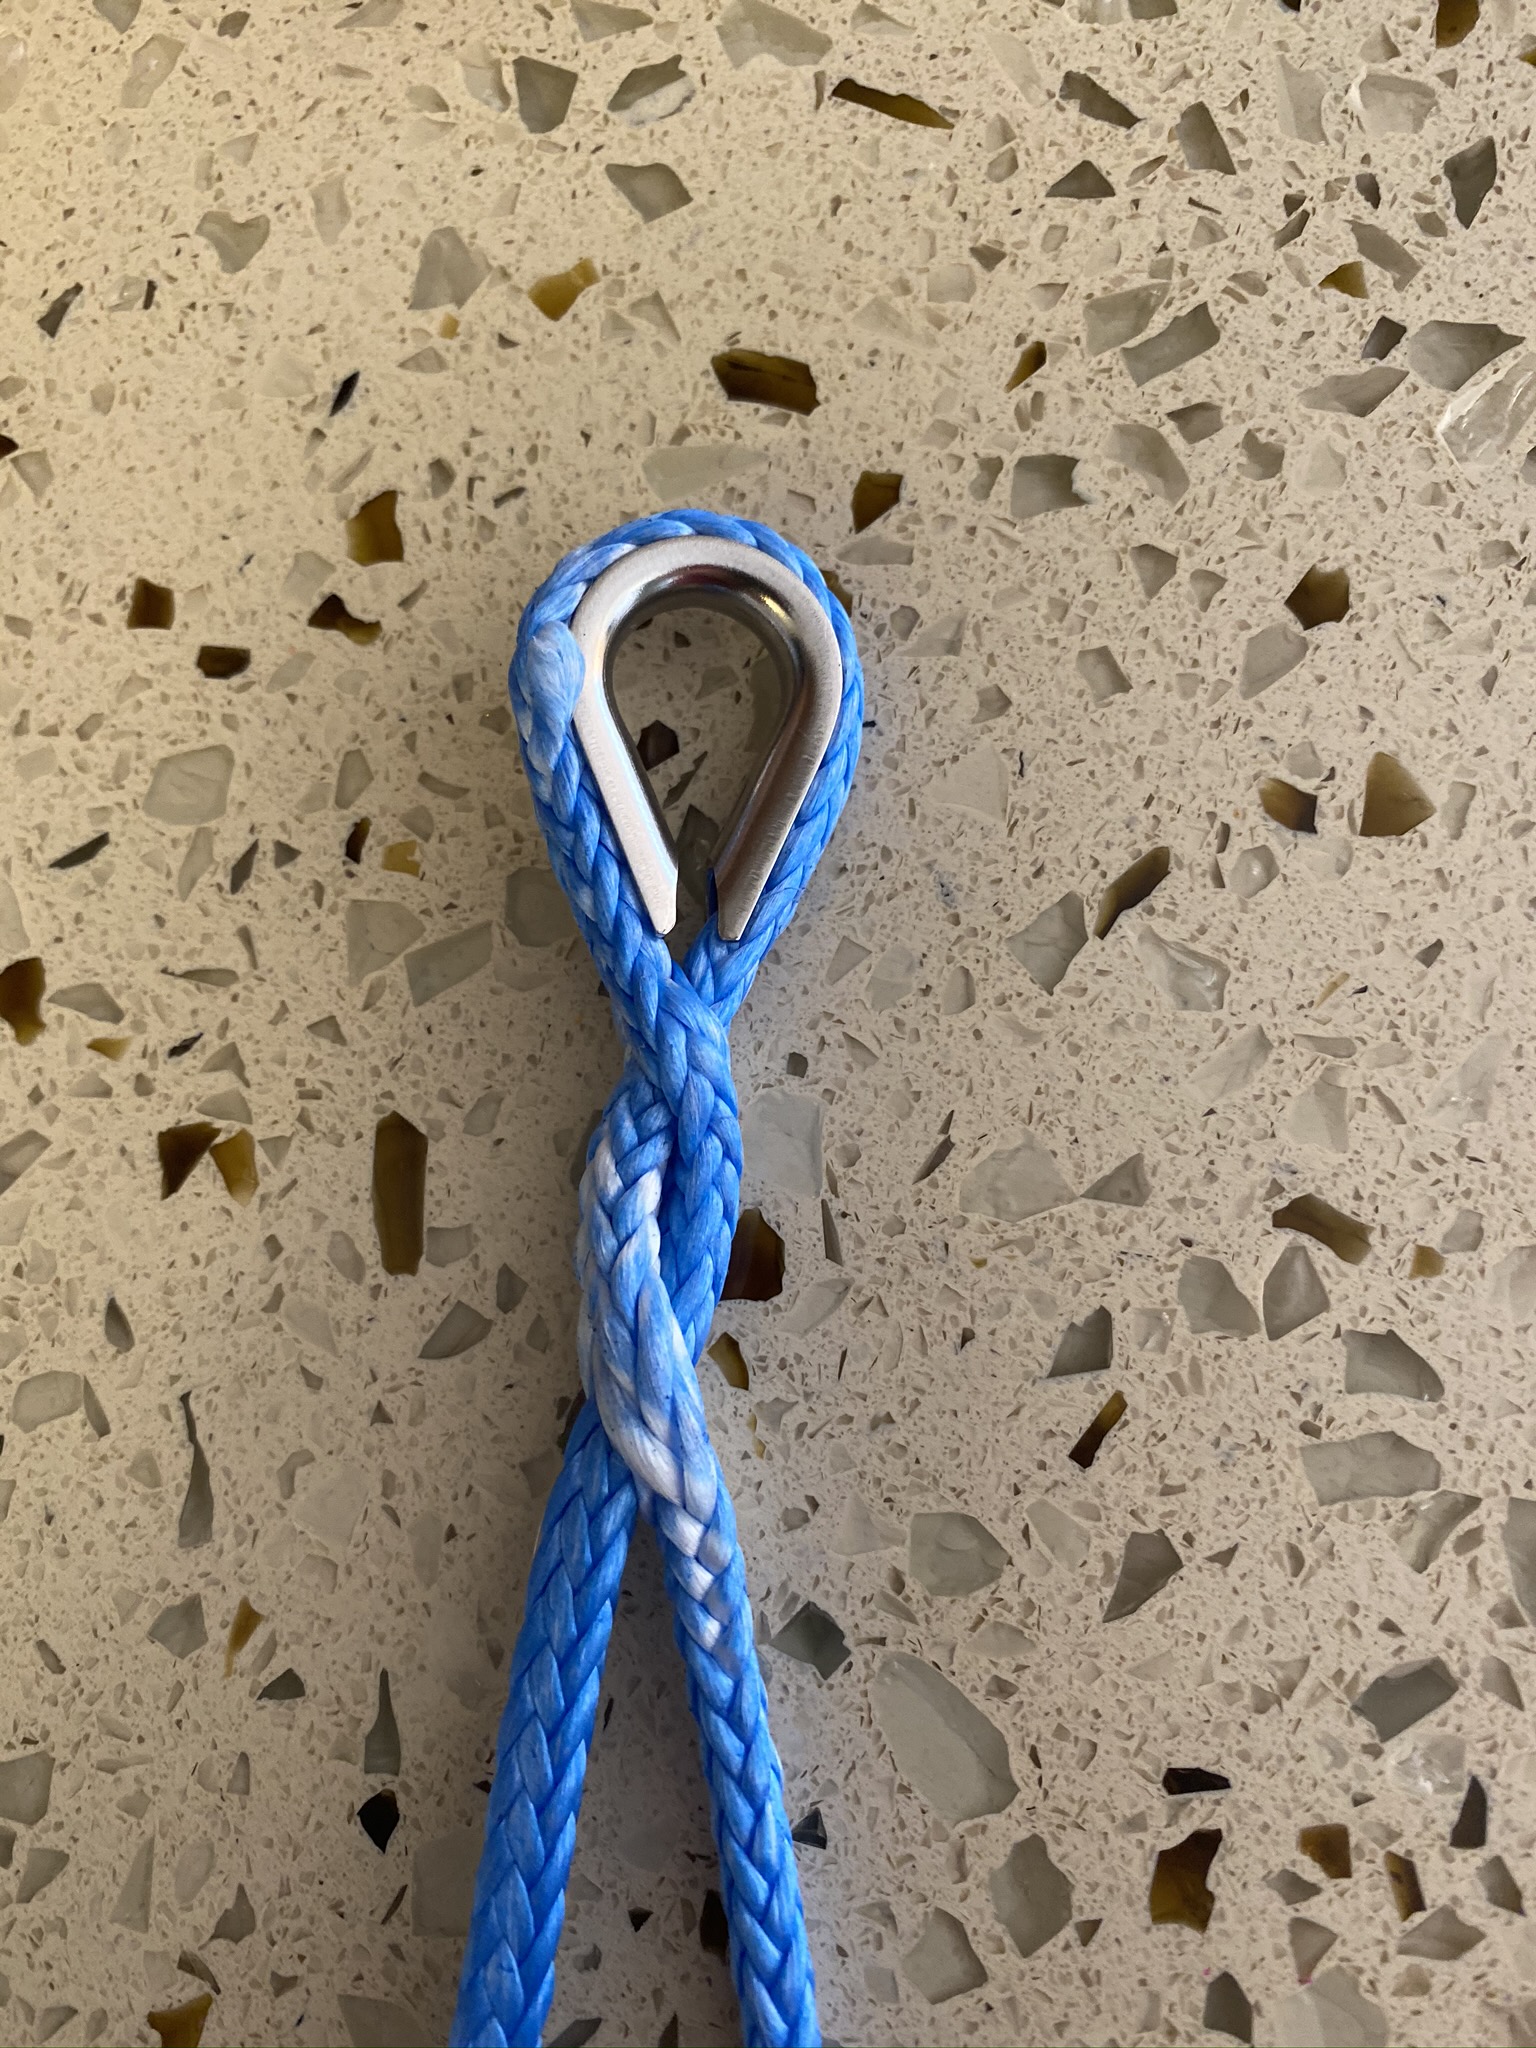
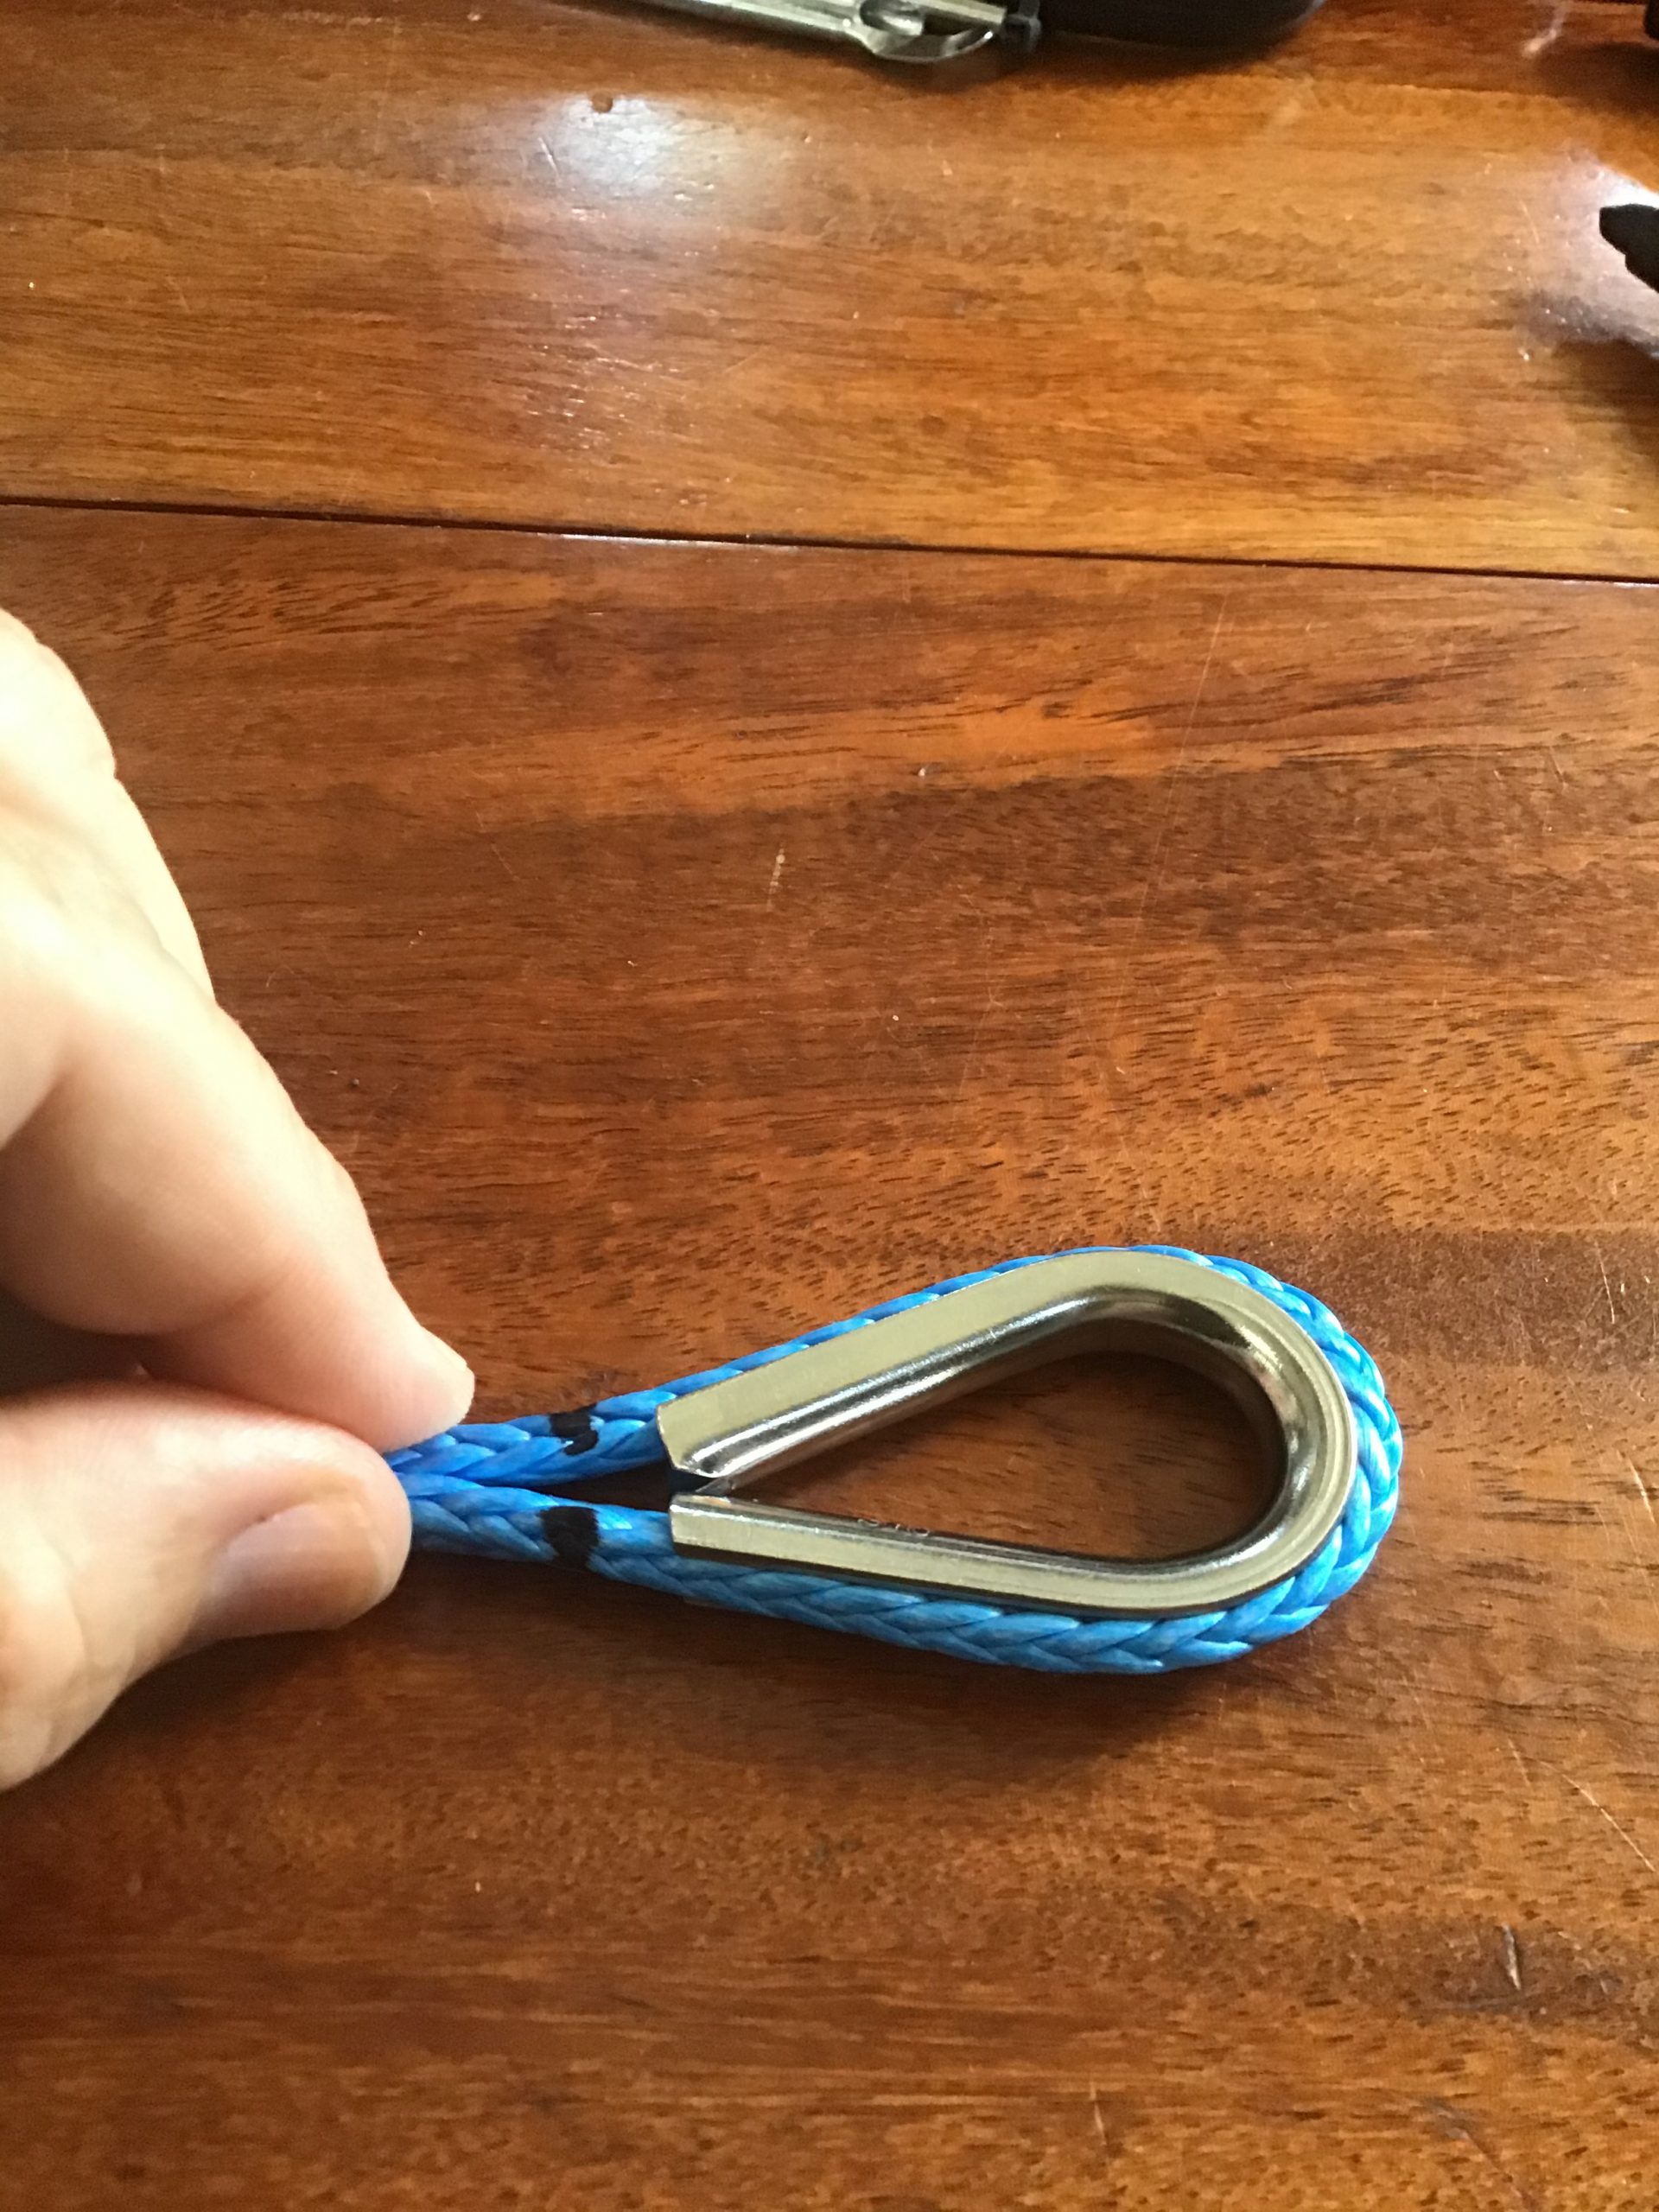
Into this……
and then this …..
The tools of the trade…..

Order yours here….. https://amzn.to/4b9VEOo
https://amzn.to/4ex5jS5
There will come a time in every boaters life when the need to splice lines together or into a loop will come along. On our boat the lifelines are made of Dyneema which is a brand name for a synthetic, 12 strand, high strength line. Unfortunately, one of ours fell victim to some unexpected chafing and it broke while we were in the Bahamas. We managed to replace it with some spare Dyneema we had temporarily using two trucker’s hitch style knots. Once we returned we had to make a final repair. So I had to learn how……
I highly recommend buying some line with which to practice, preferably something with a slightly larger diameter to make the first attempts easier. At the end of making your loop you will need to bury the tail inside the line. You’ll find varying mathematical opinions on how long this tail should be. I usually use a length around 21 times the diameter of the line, which for a 3/8” line equals a tail of about 8”.
This method works well because you only need access to one end of the line since quite often the other end already has a loop in it and is attached to the boat.
Measure out your tail and make your loop…..
Next you’ll need to mark two spots on the line where the loop will come together….don’t make it too close to the loop because you’ll want to fit that metal thimble inside the loop when you’re done.
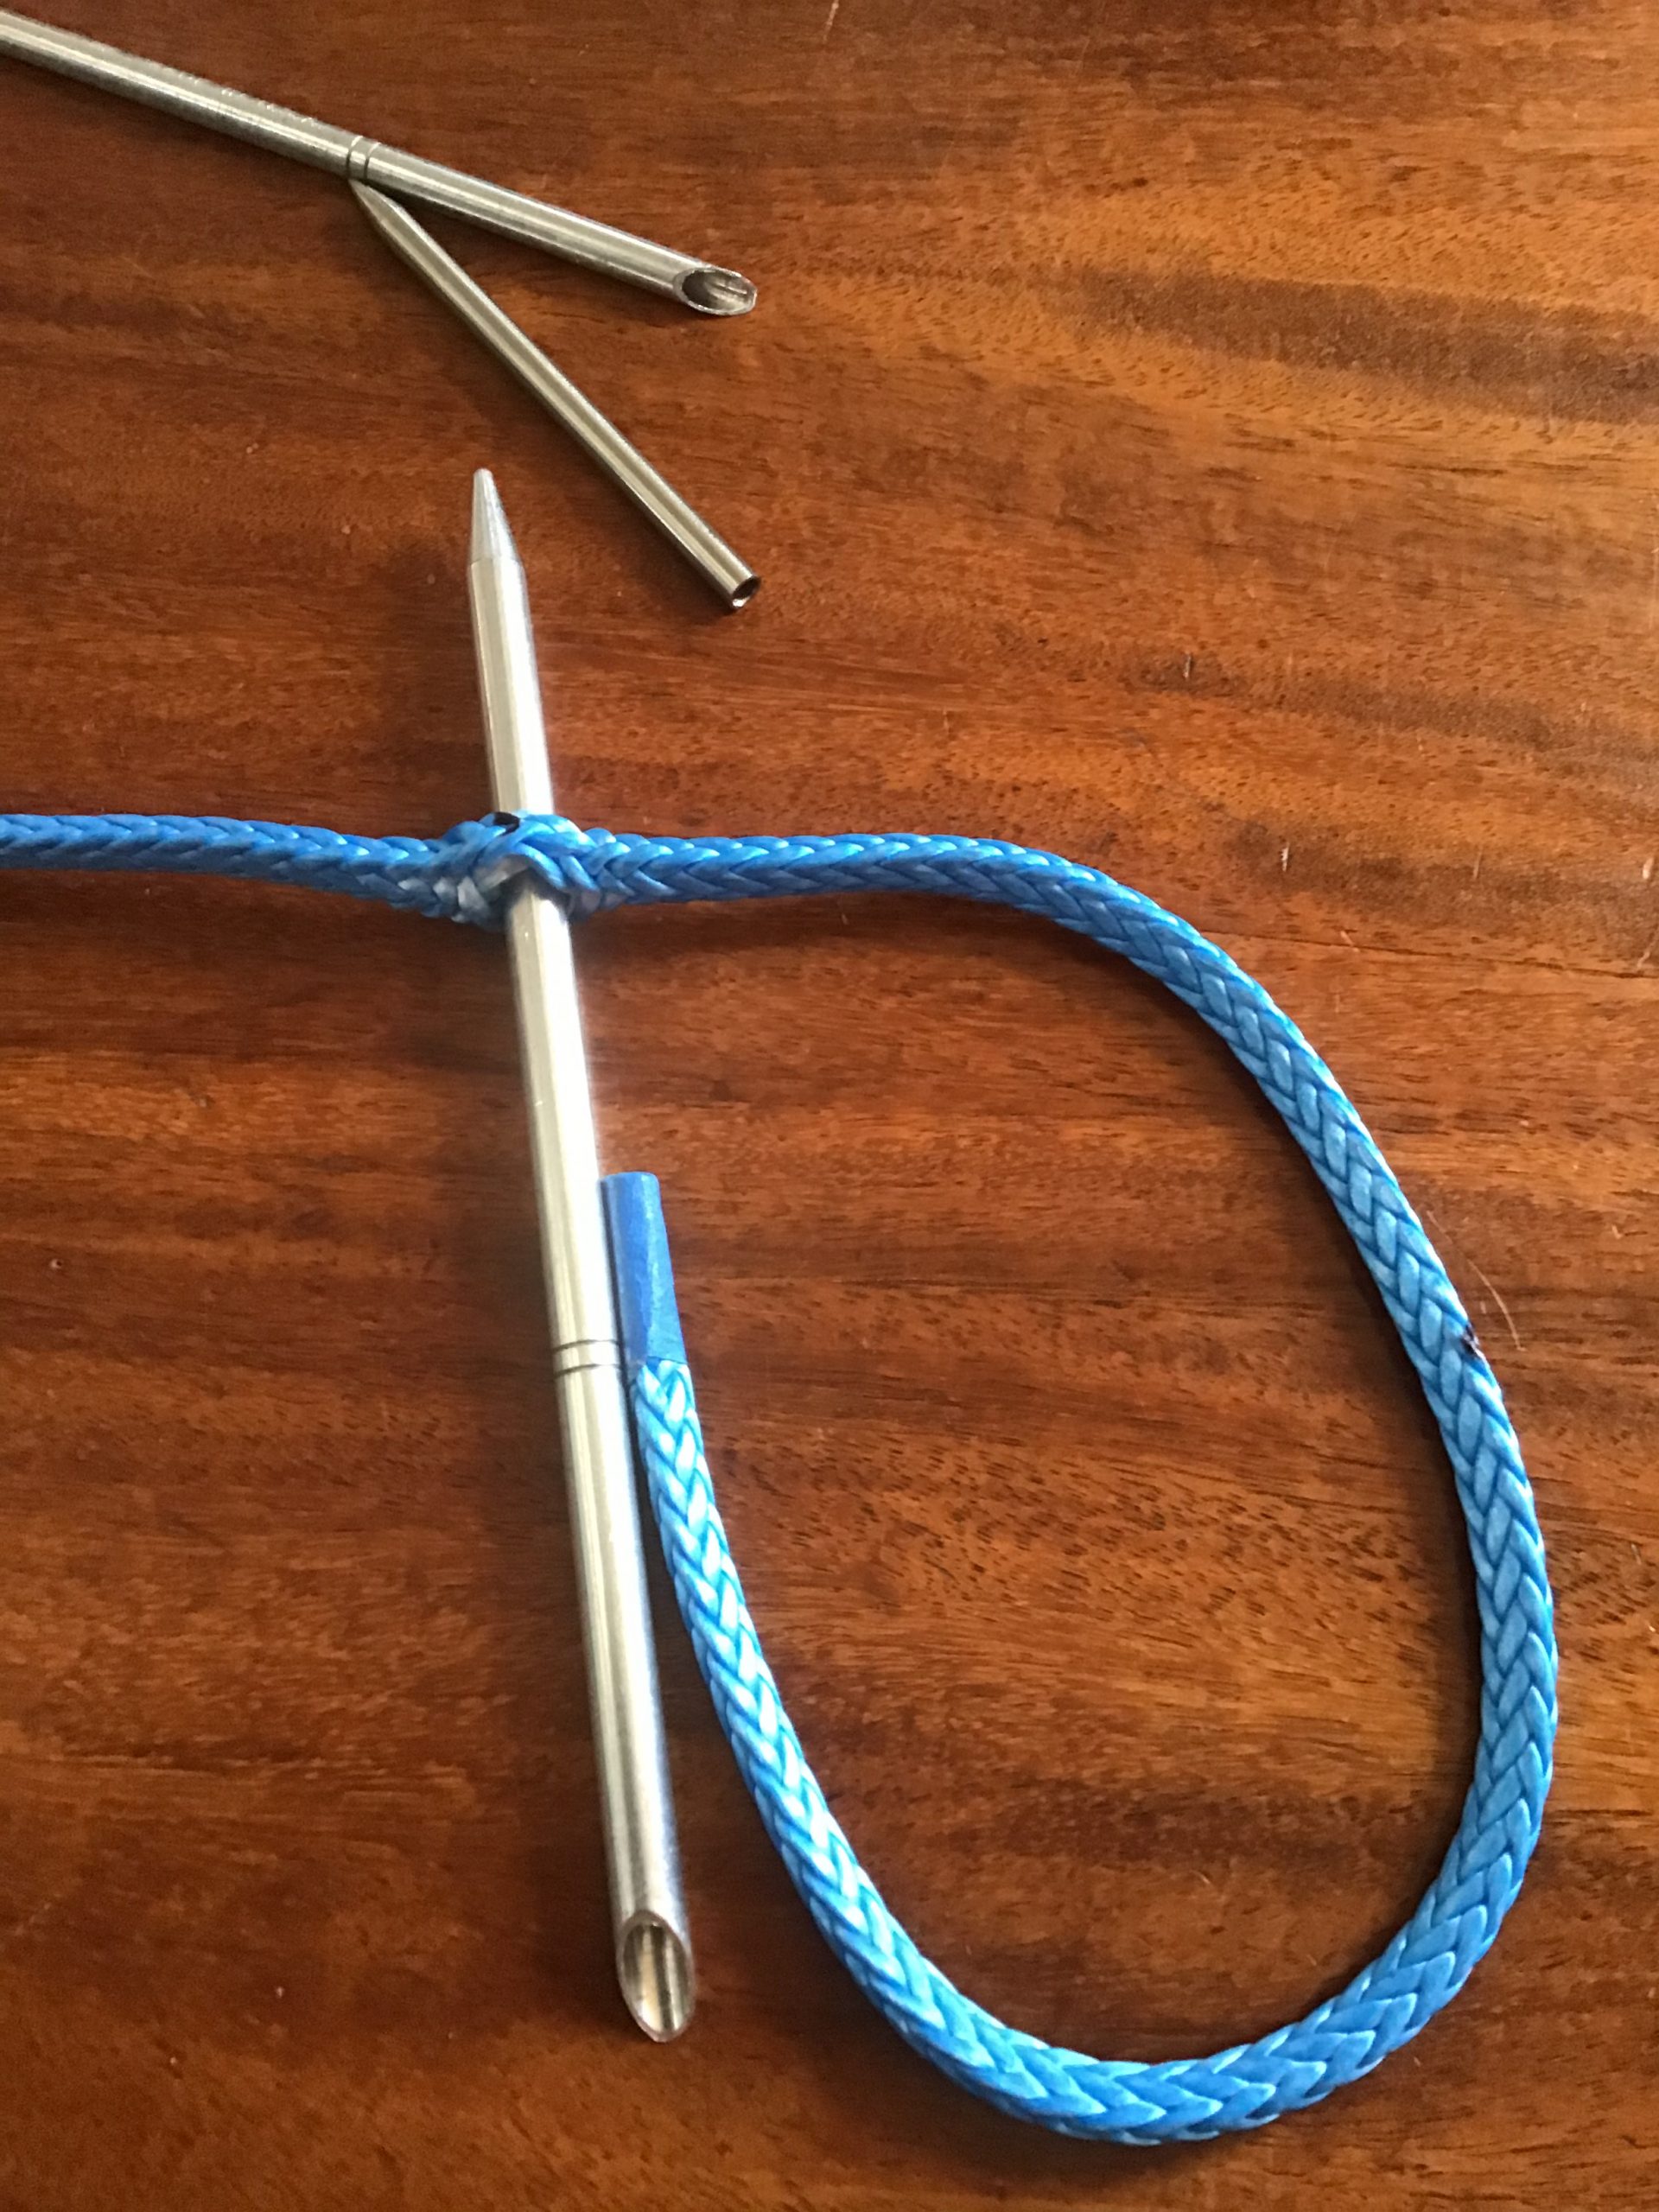
It helps to imagine 12 strand line like a Chinese finger puzzle. When you push the line together on either side of the mark it will bulge and open slightly. Slide the end of your line through mark 1. You can also work a smaller fid into the same hole and work the fids back and forth in a crossing fashion, to widen the hole.
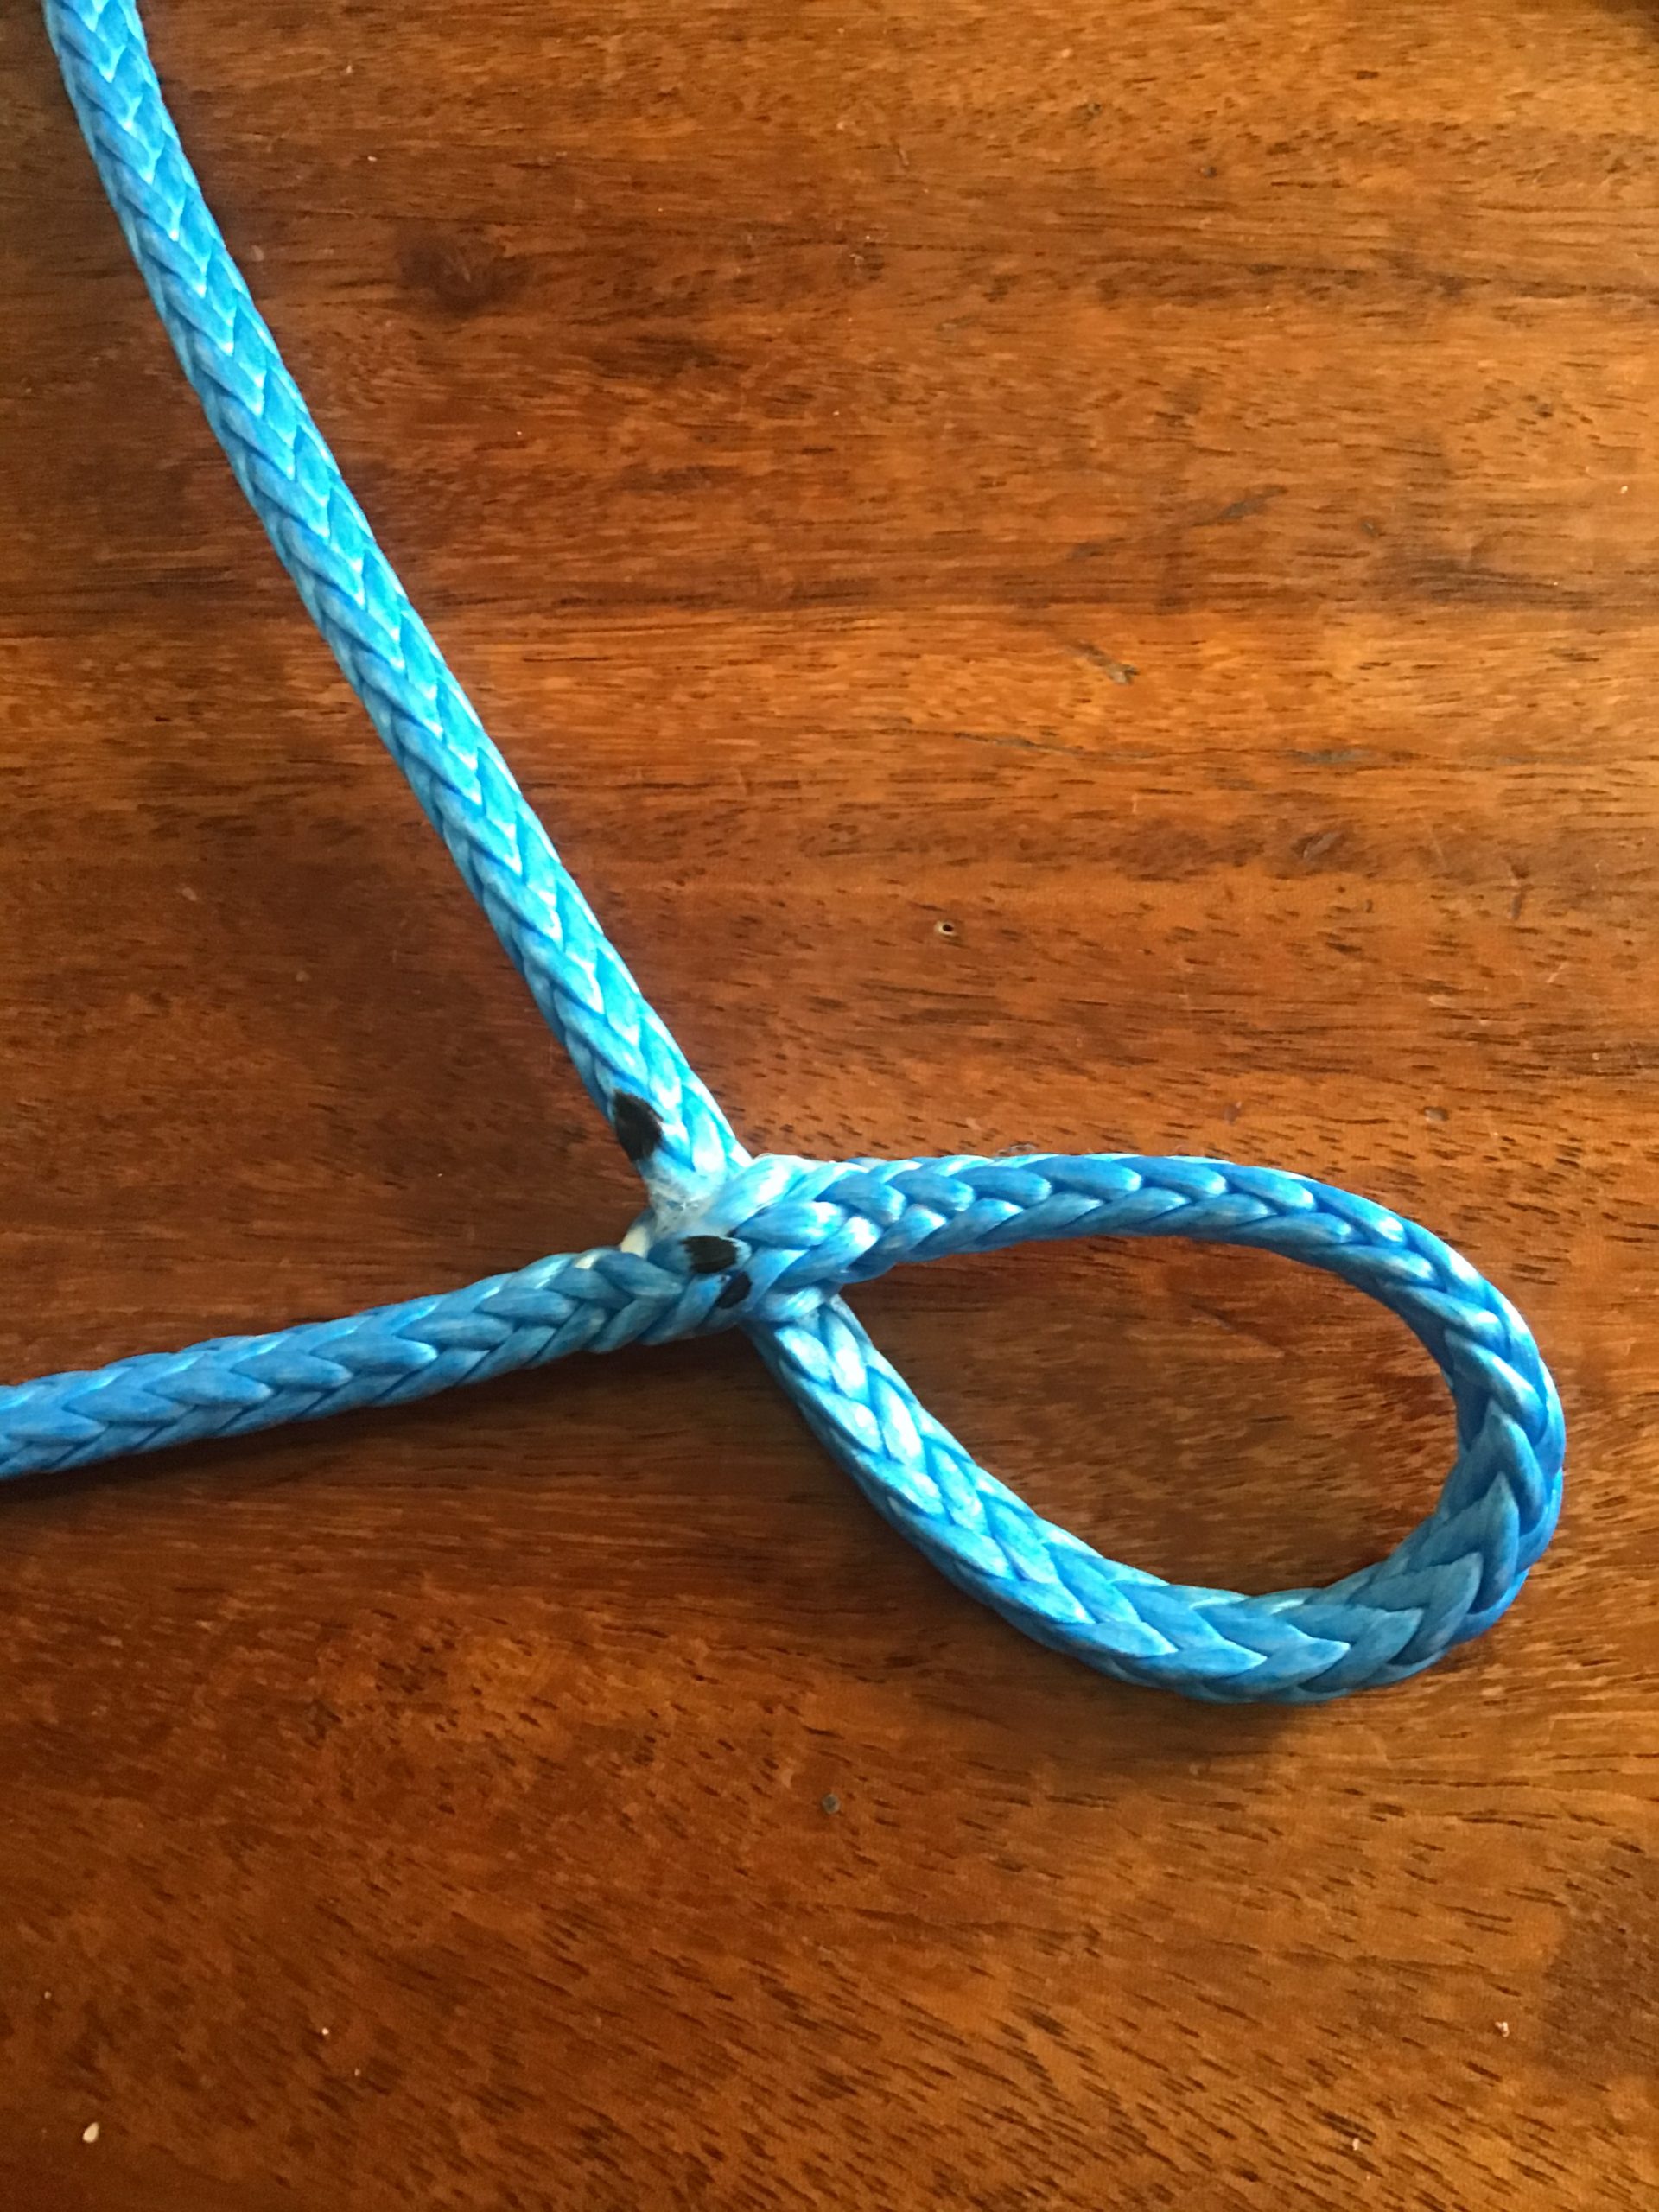

 Slide the marks together to form the loop and then work the thimble into the loop…..Dyneema will lengthen if you put some tension on it as the strands become compressed together…..be patient.
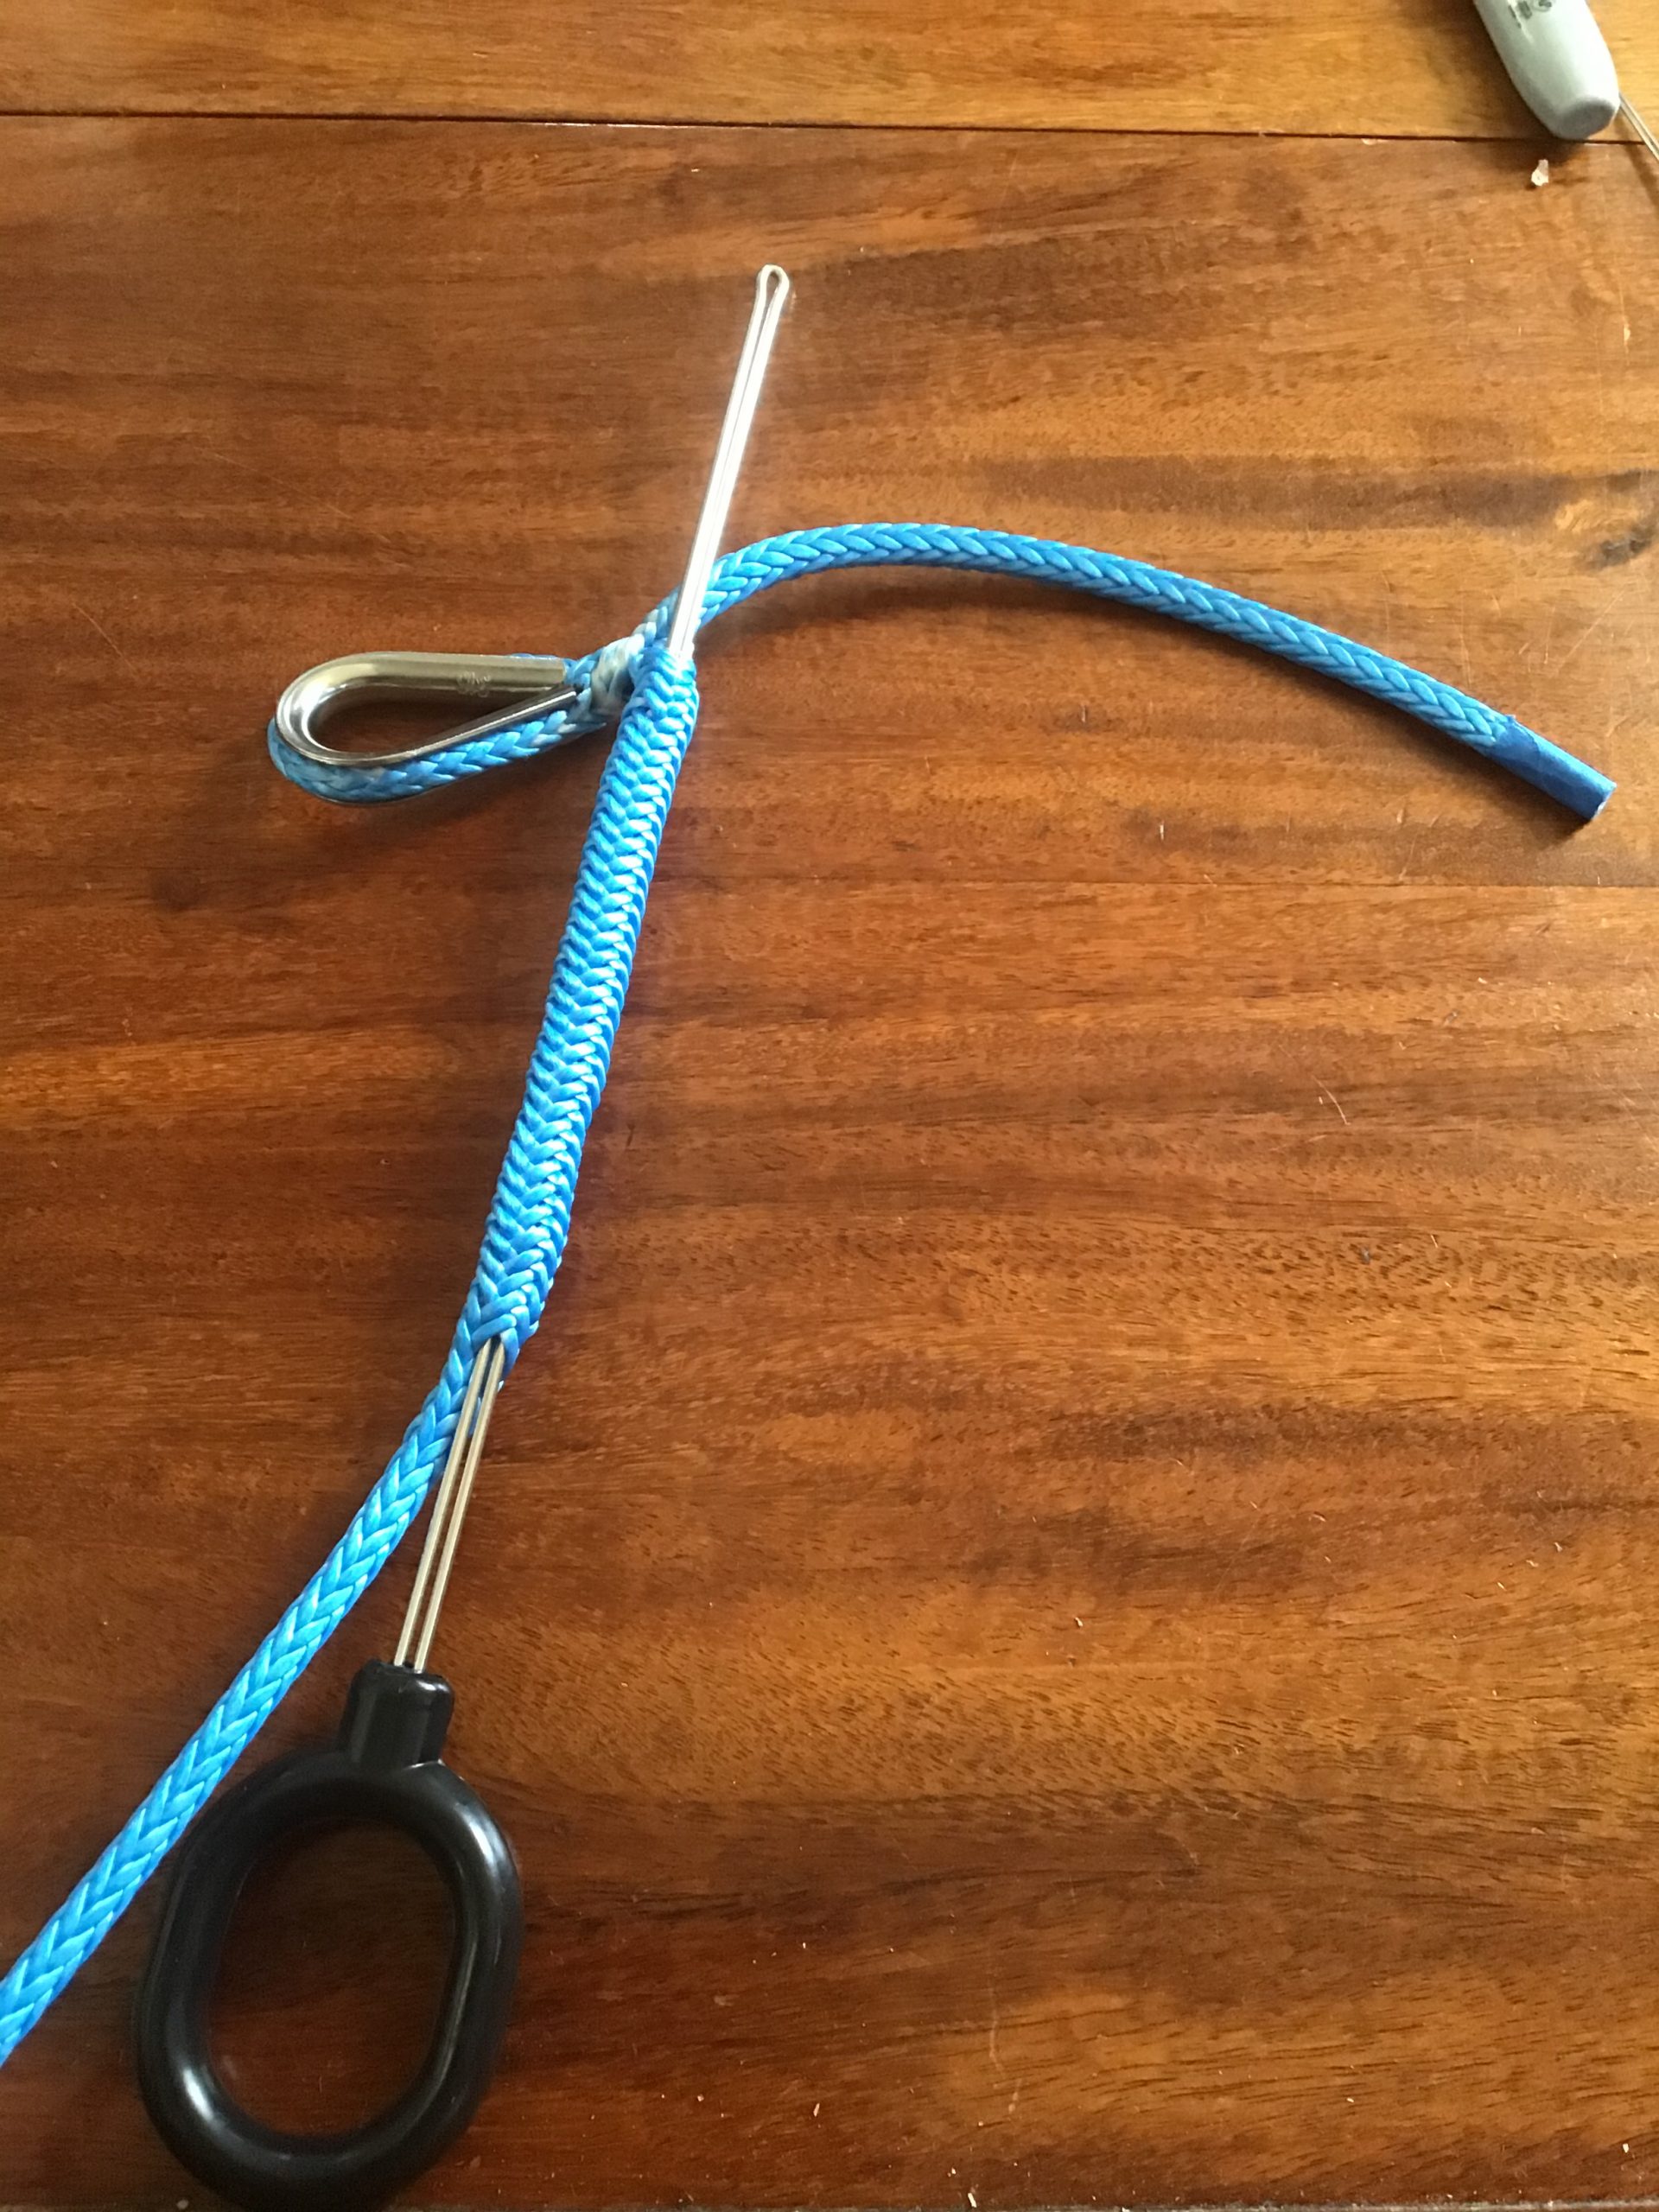
Next….at a point just beyond the length of the tail insert your D-splicer which you will use to pull the tail inside the line and “bury” it….pay close attention to the instructions for the D-splicer and only use the very end of the line in the splicer.

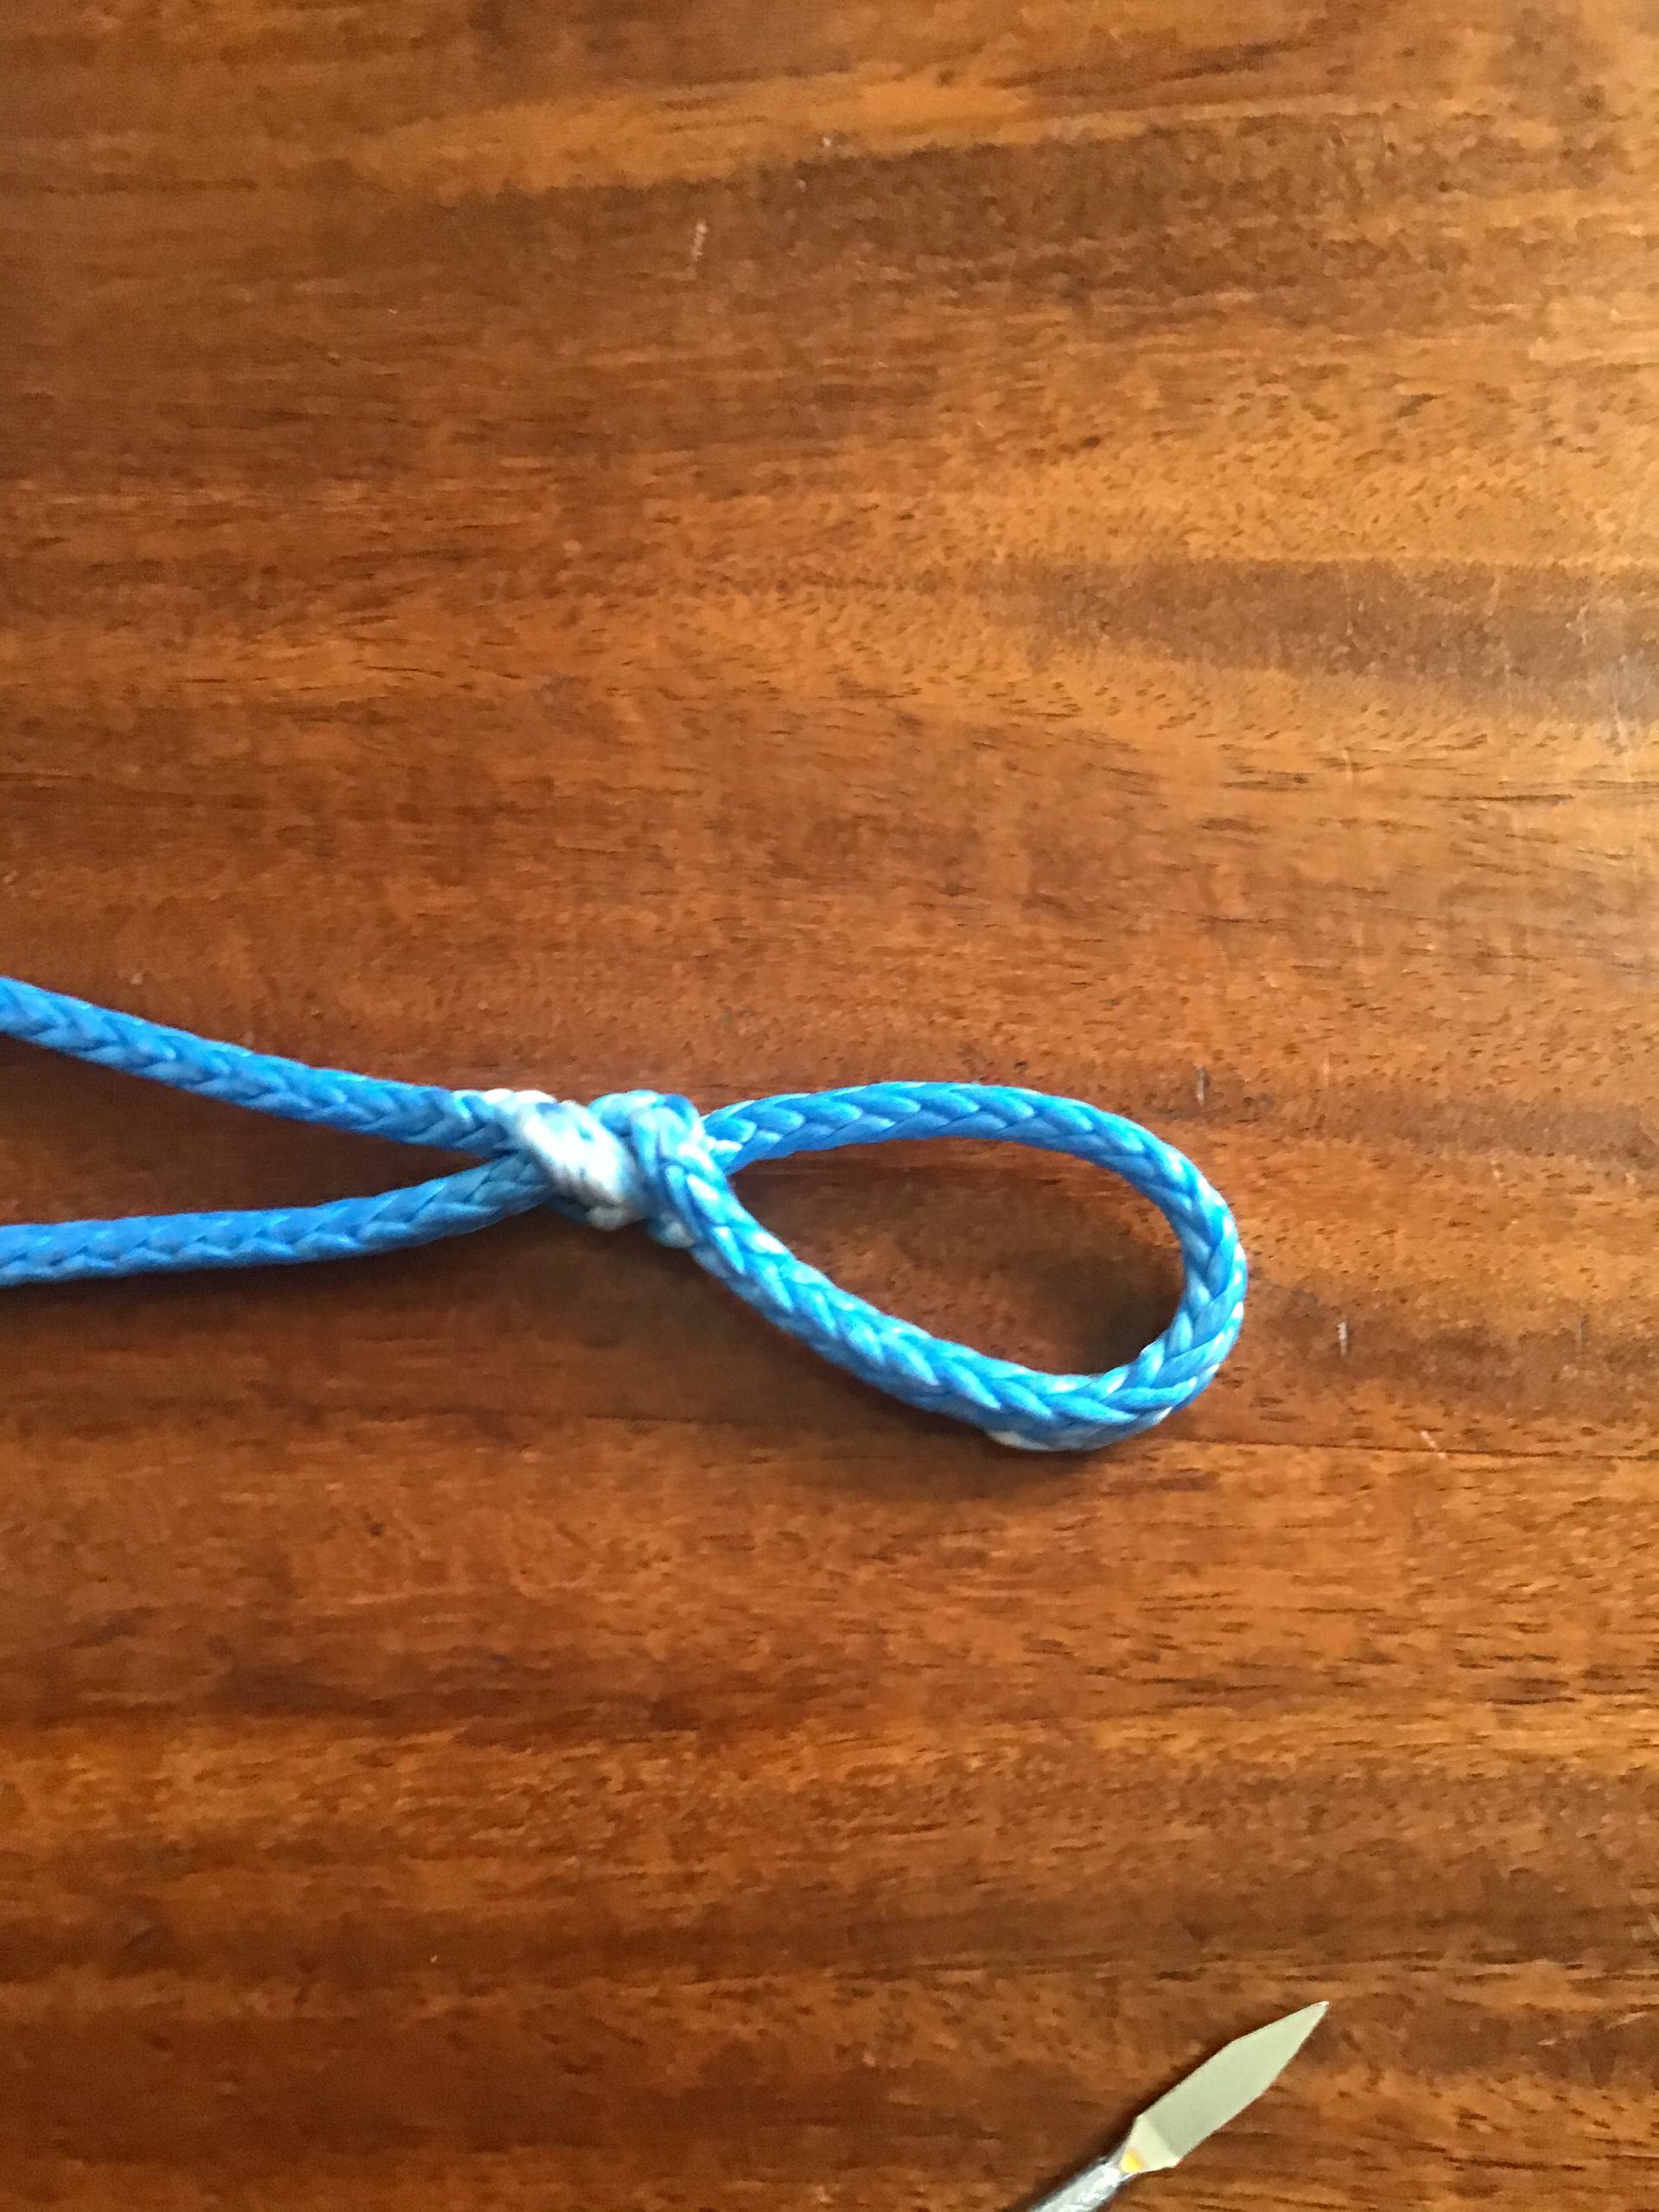
Separate the strands at the end and trim them into a taper to prevent any loss of strength in the outer line and work the end back inside the line to “bury” it…unfortunately the coloring on Dyneema isn’t a dye, just a surface color, so it will rub off…..
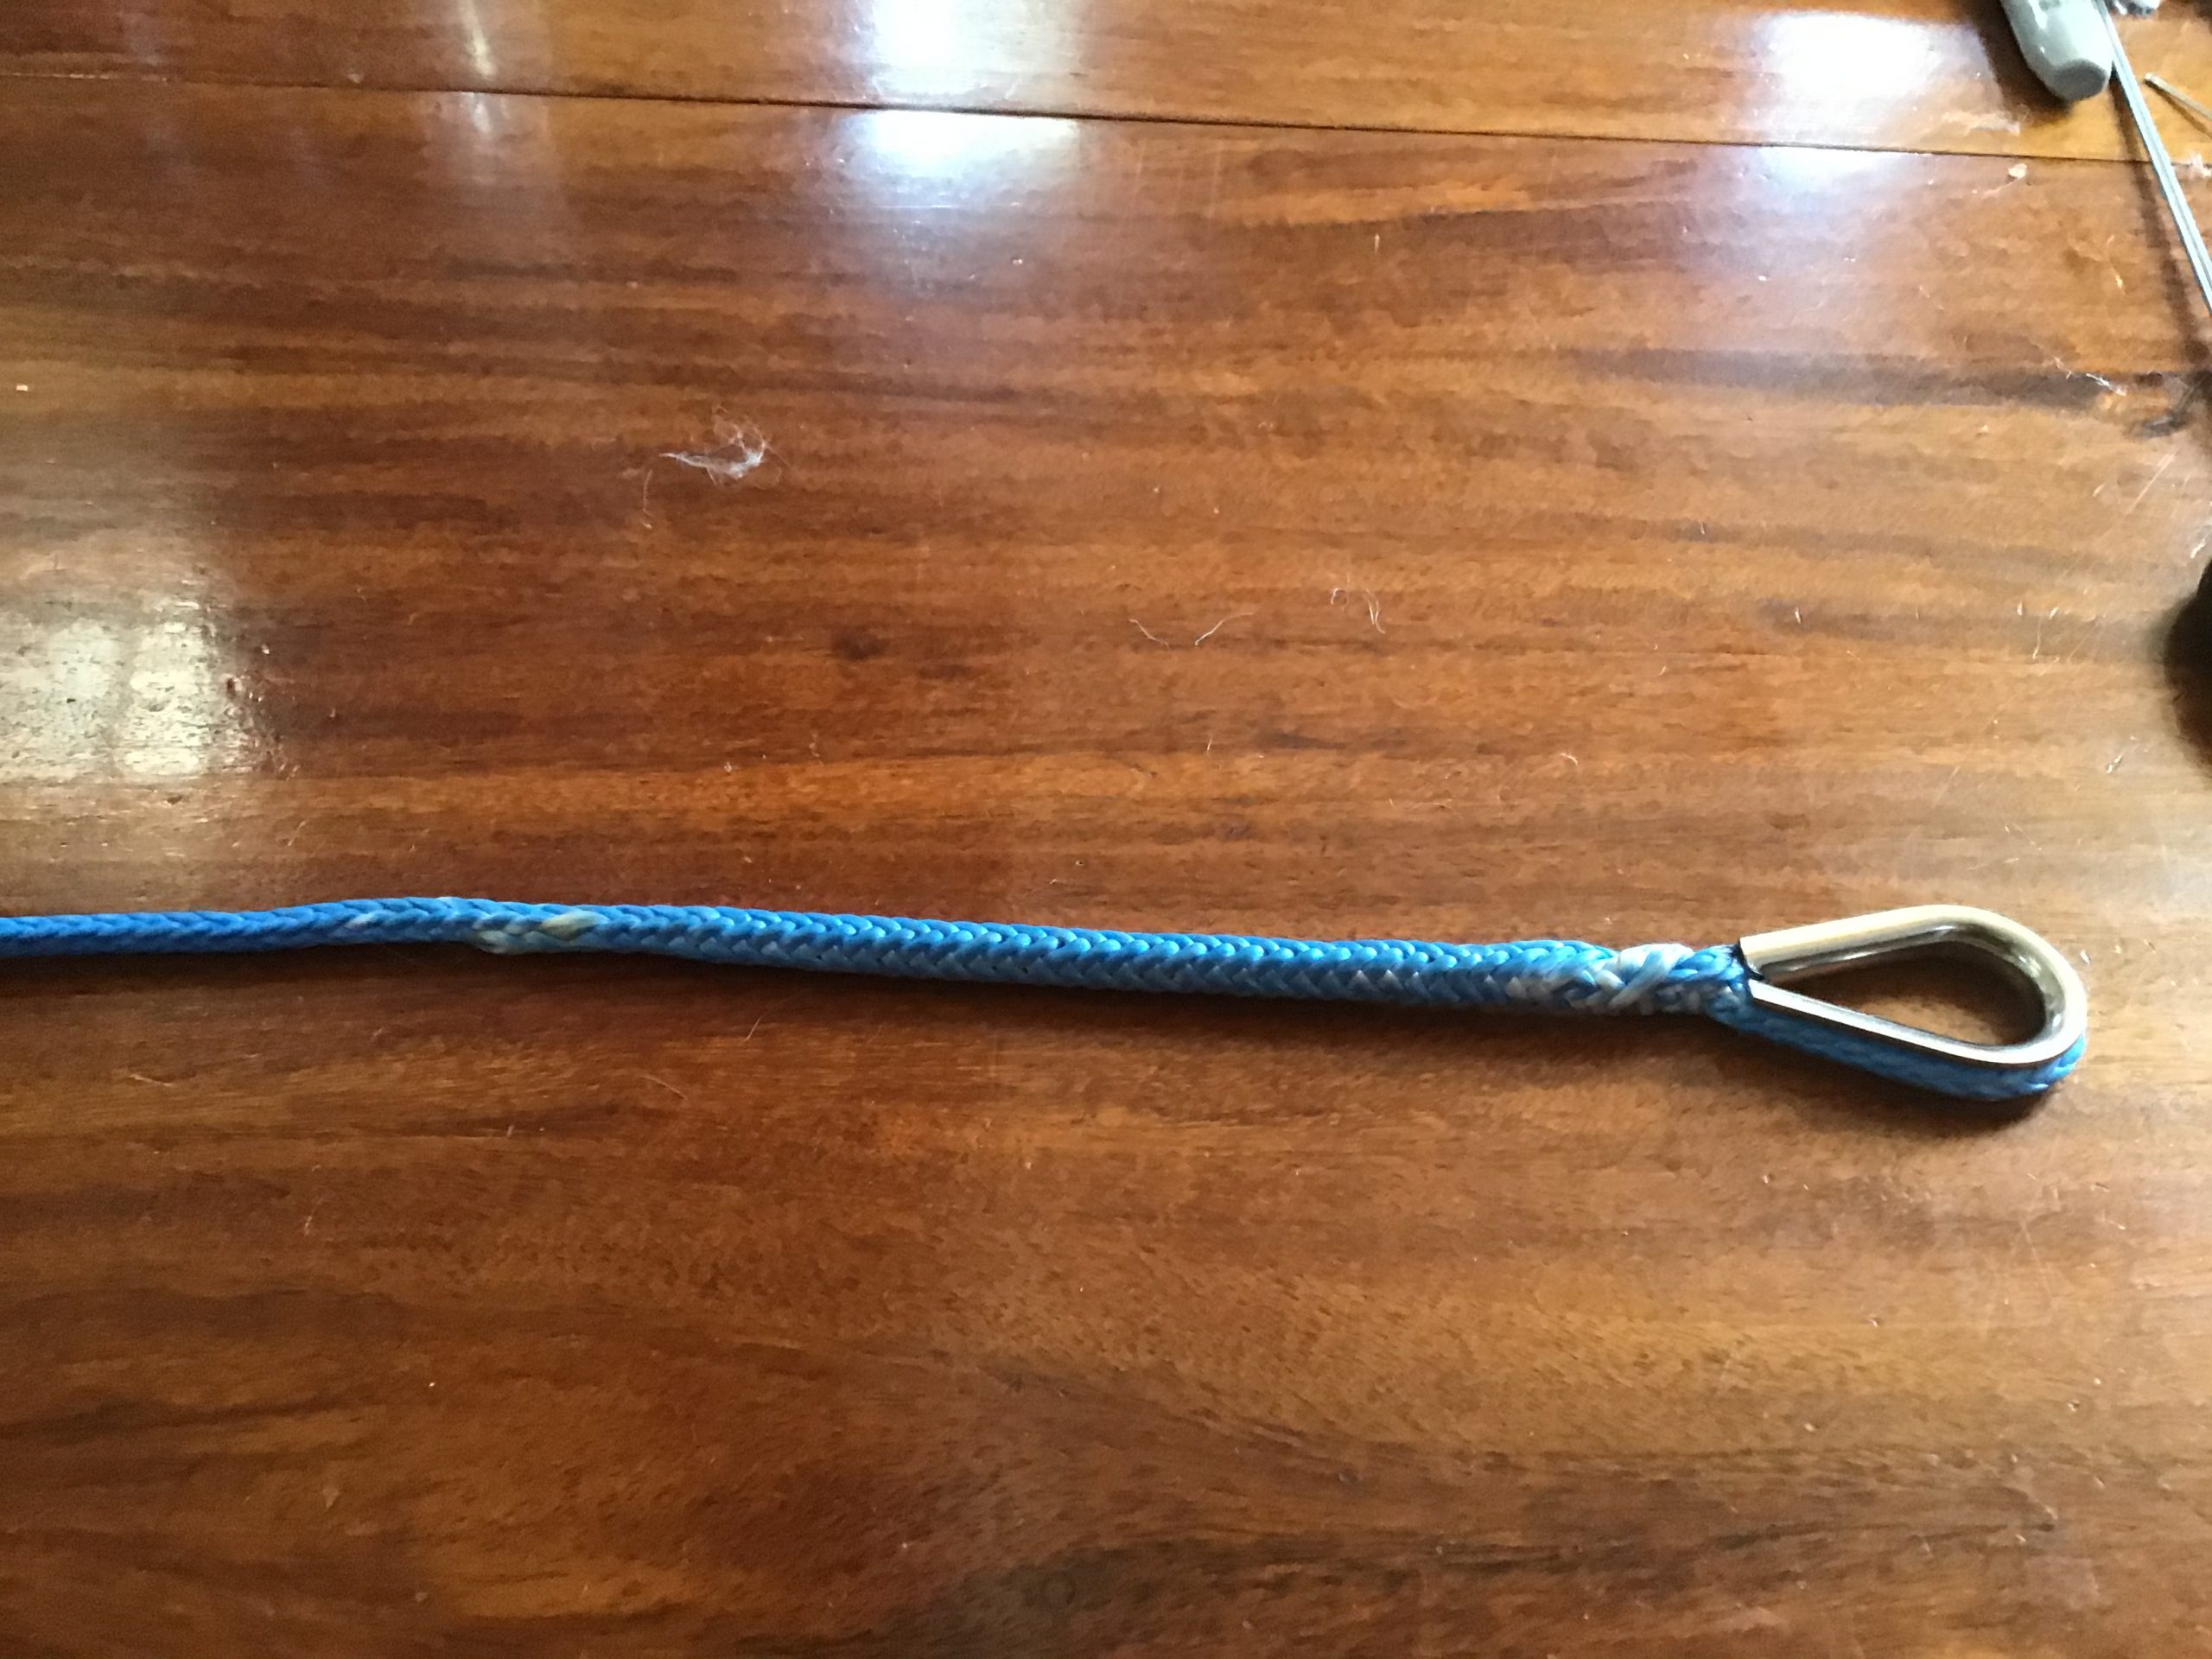
And you’re done ….
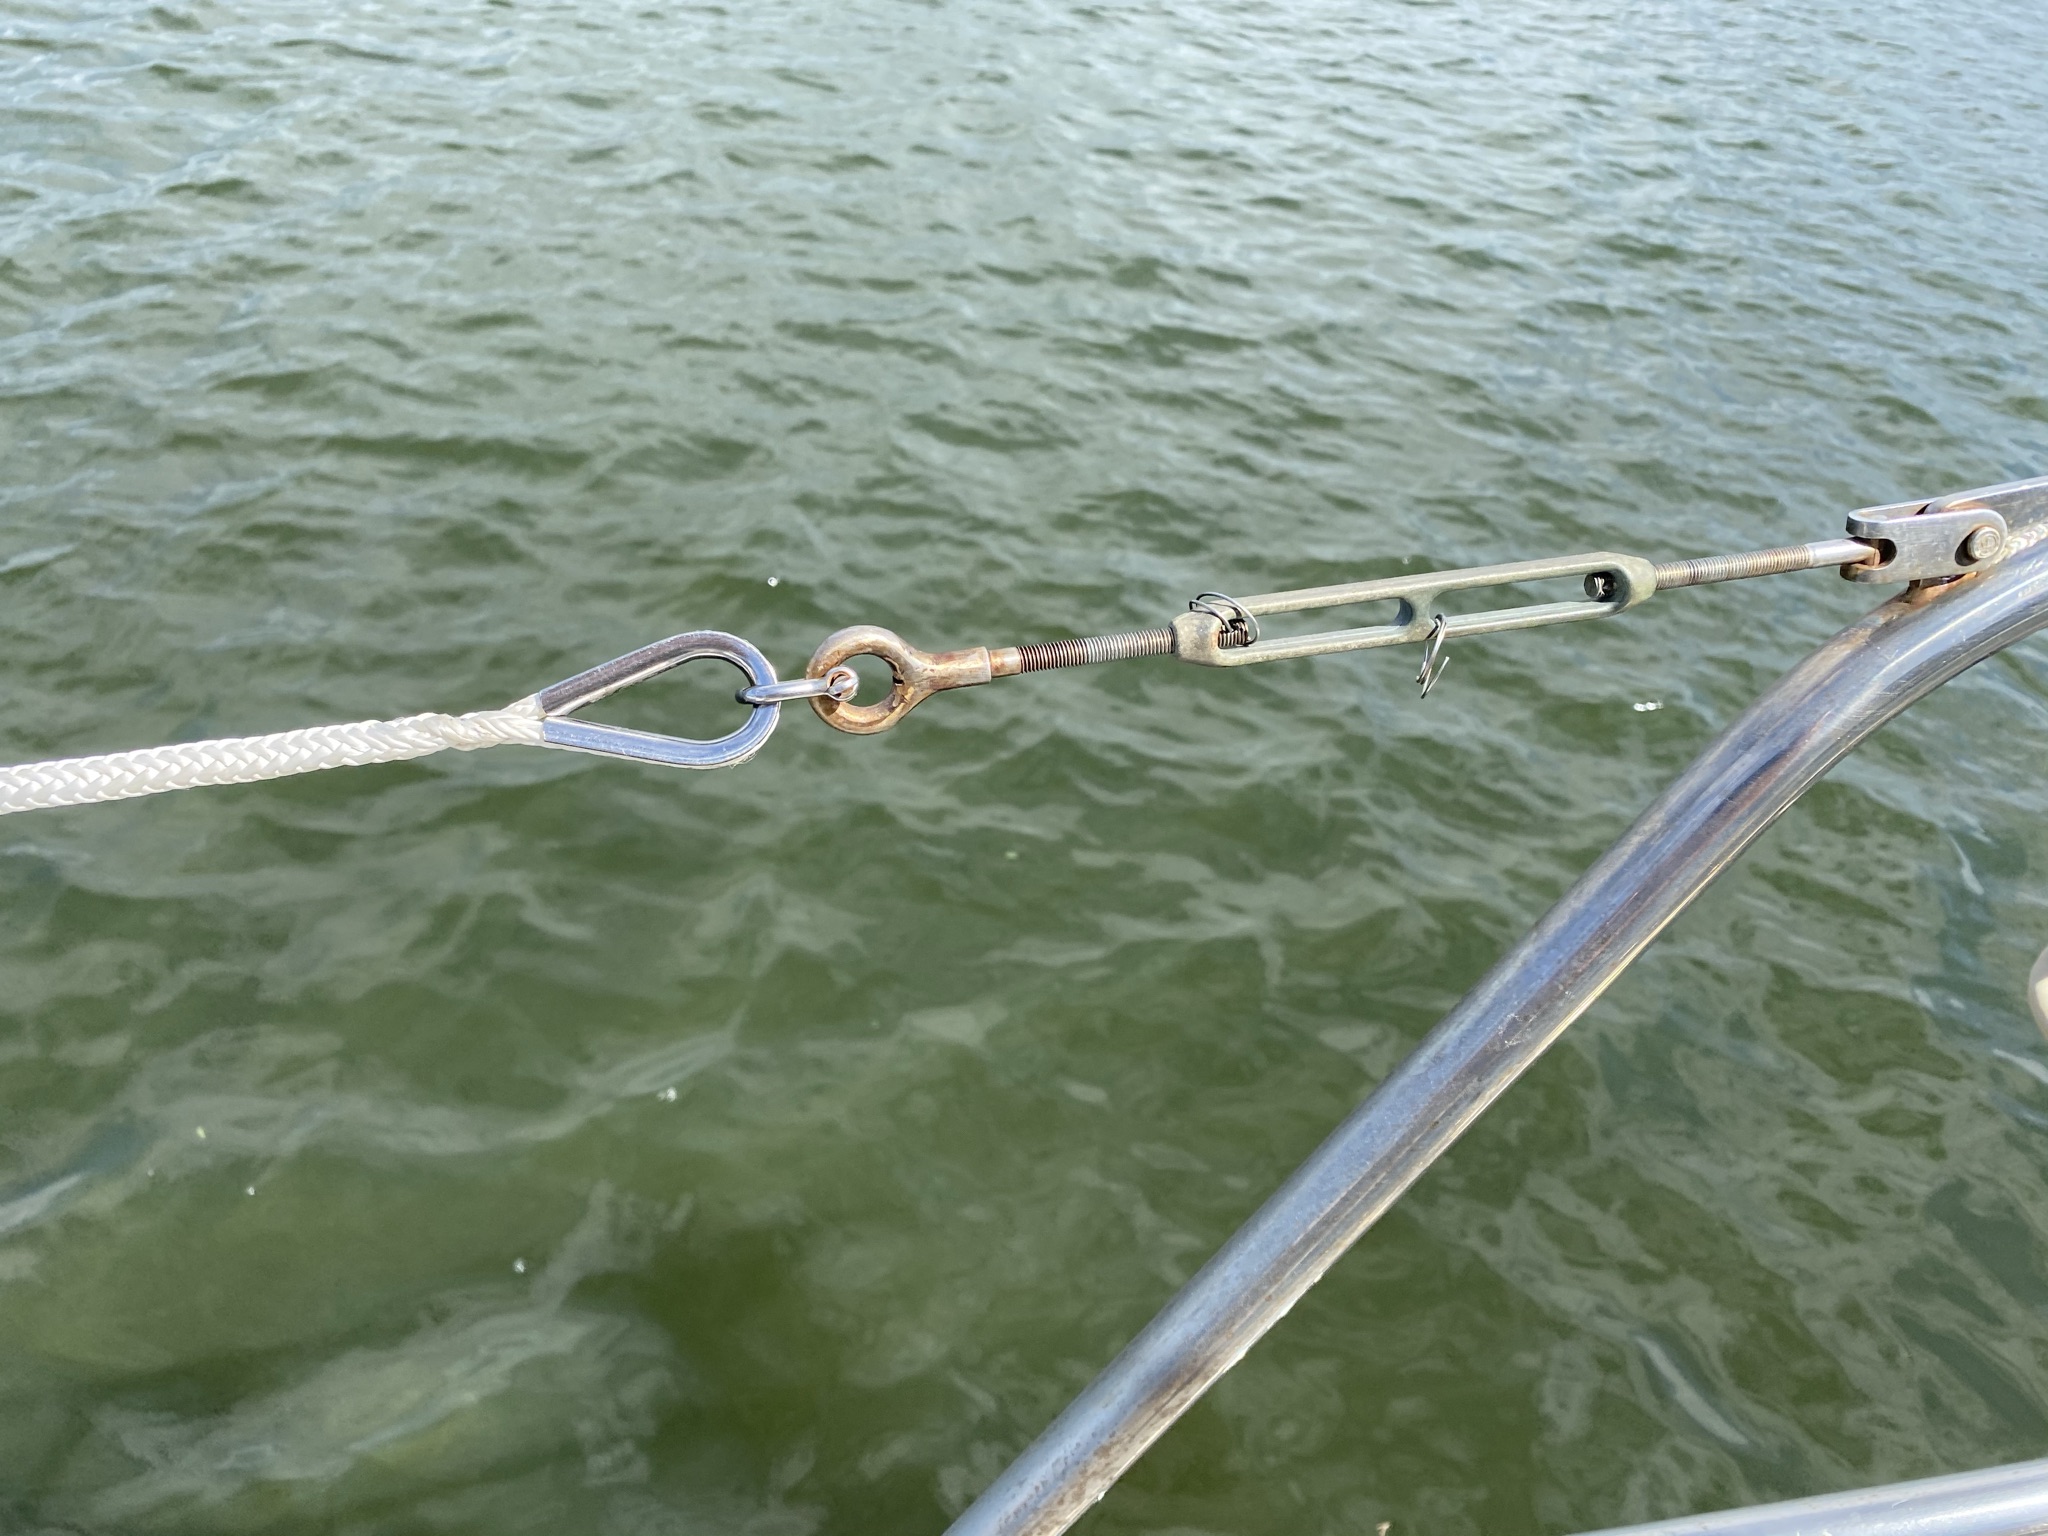
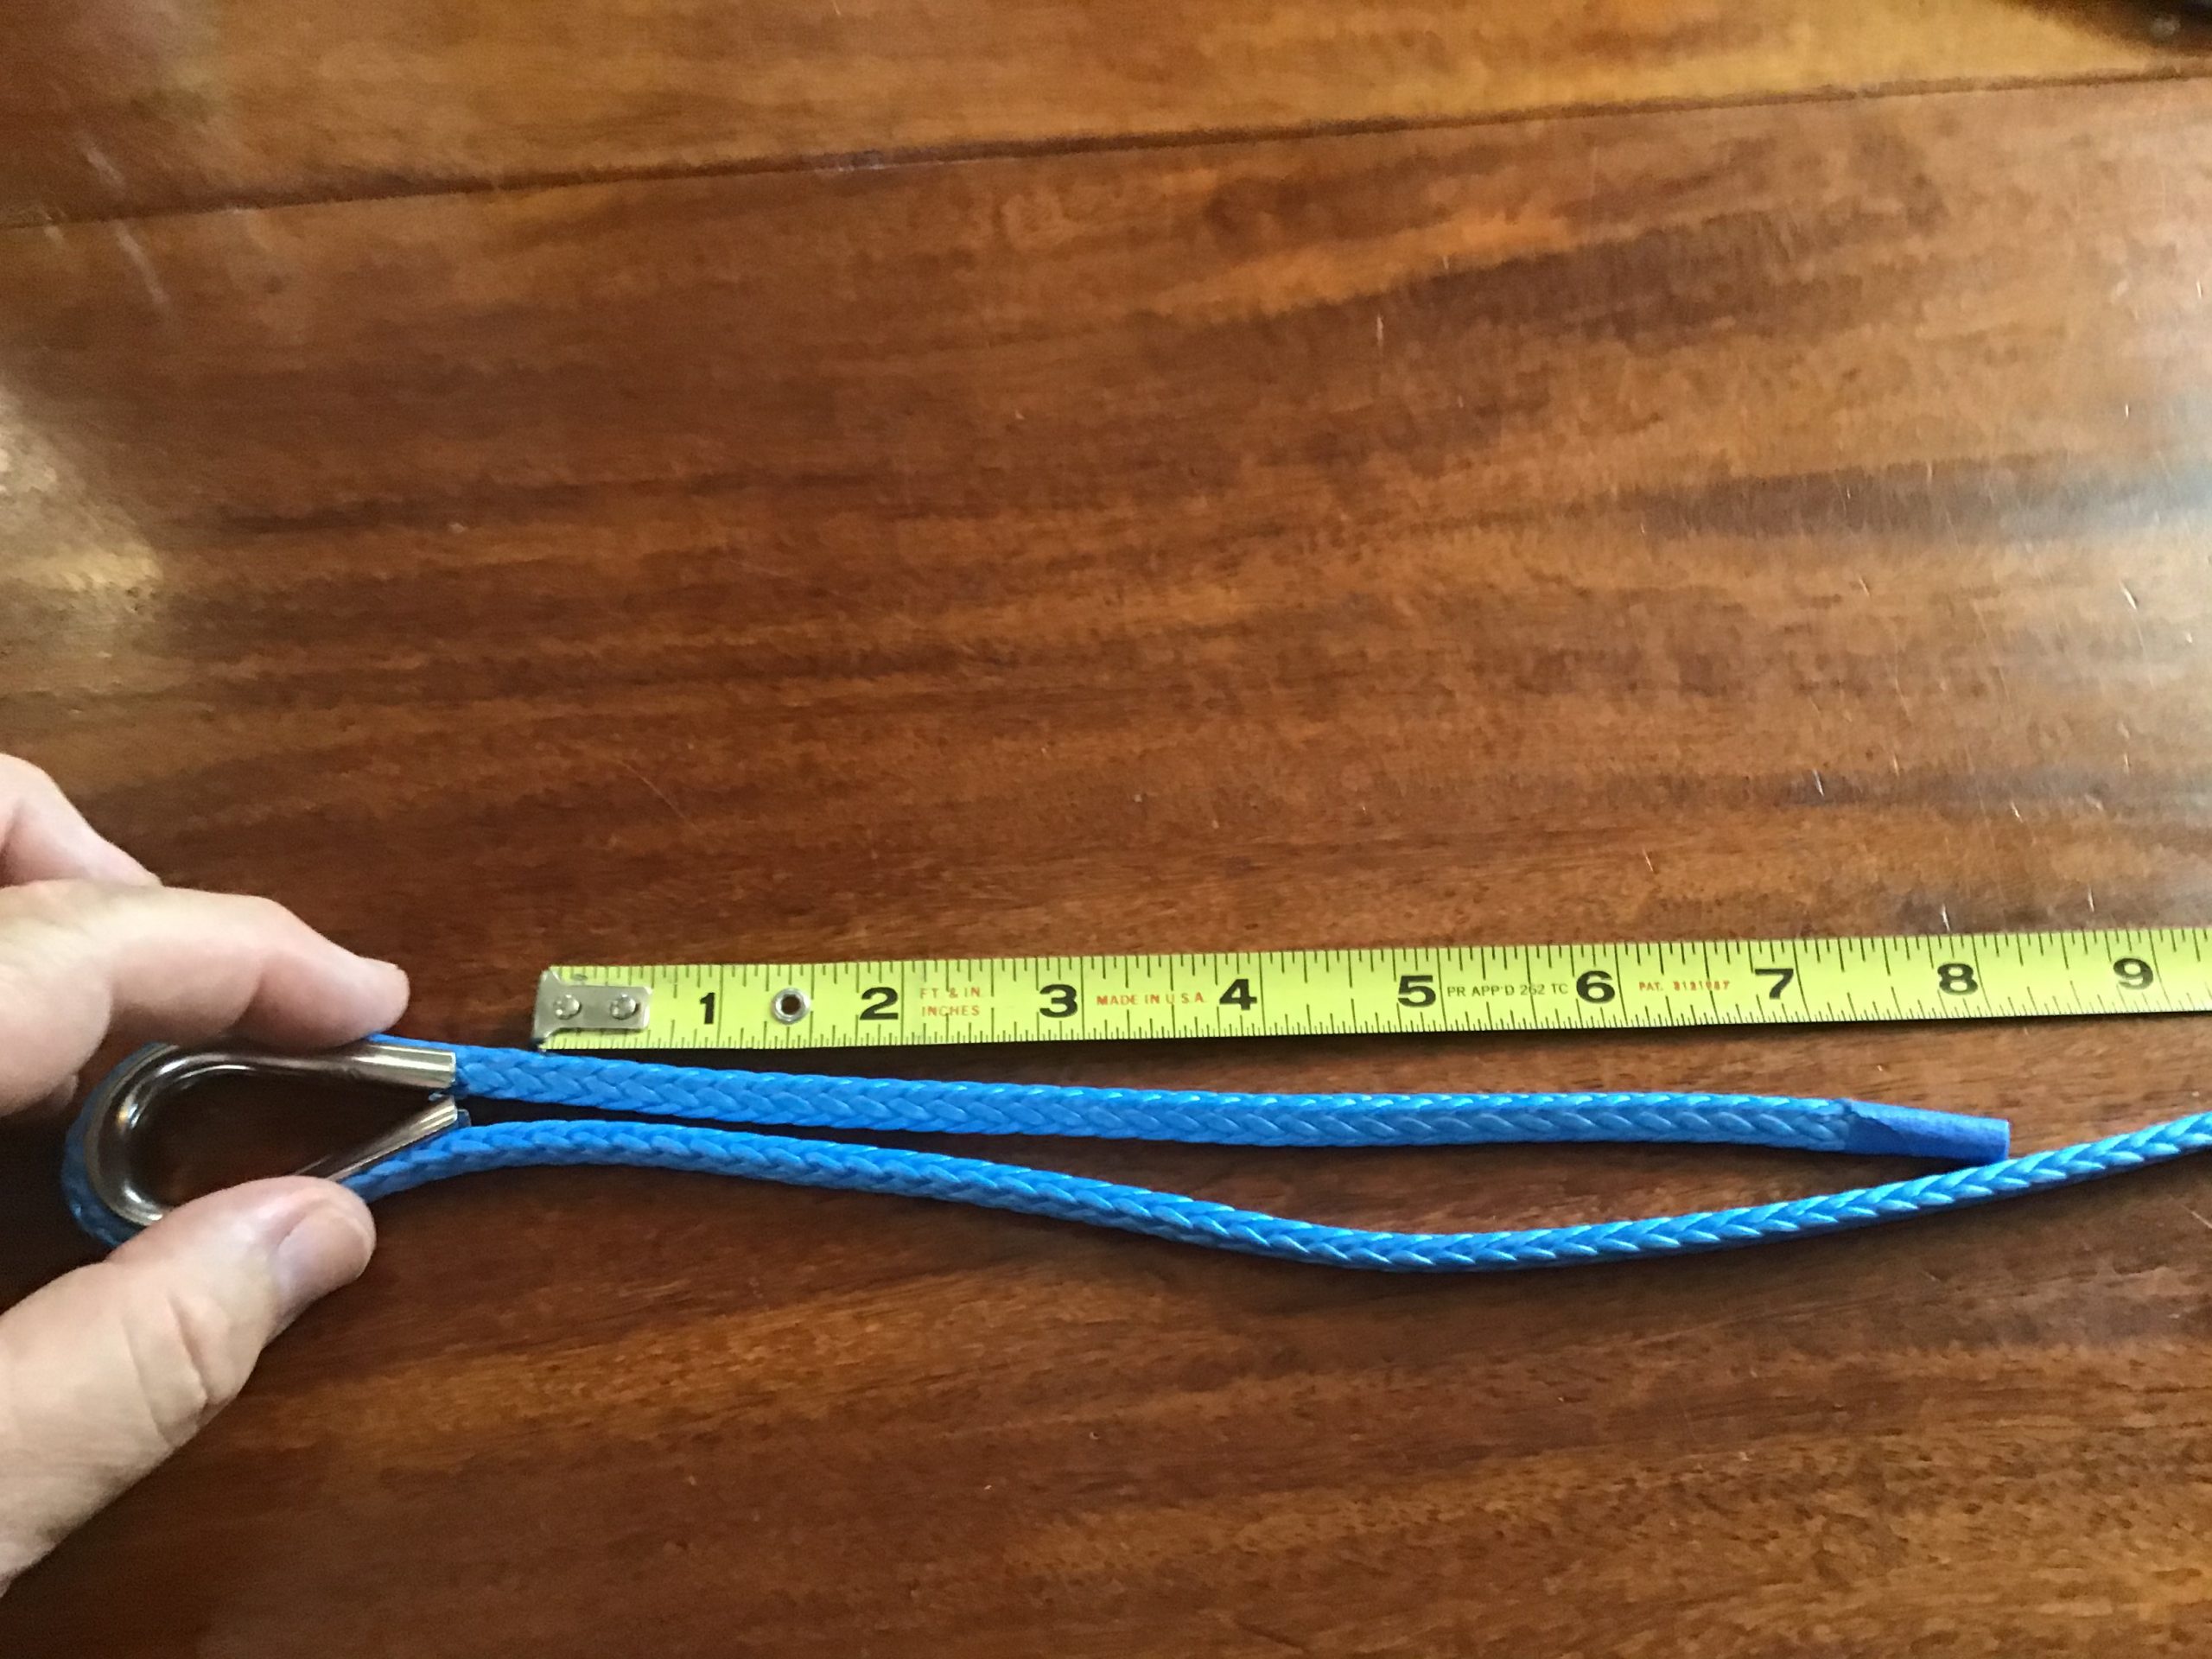
Here’s the line I replaced …….but since this was my first time I failed to account for the loss in line length due to the 12 strand being expanded by the tail being buried inside the line. I also never found any warning about this in the tutorials or videos I watched online. The rough math in that is you’ll need about 20% more length based on the length of the tail you bury, so make your loop about 2” longer if you’re using 3/8” line.
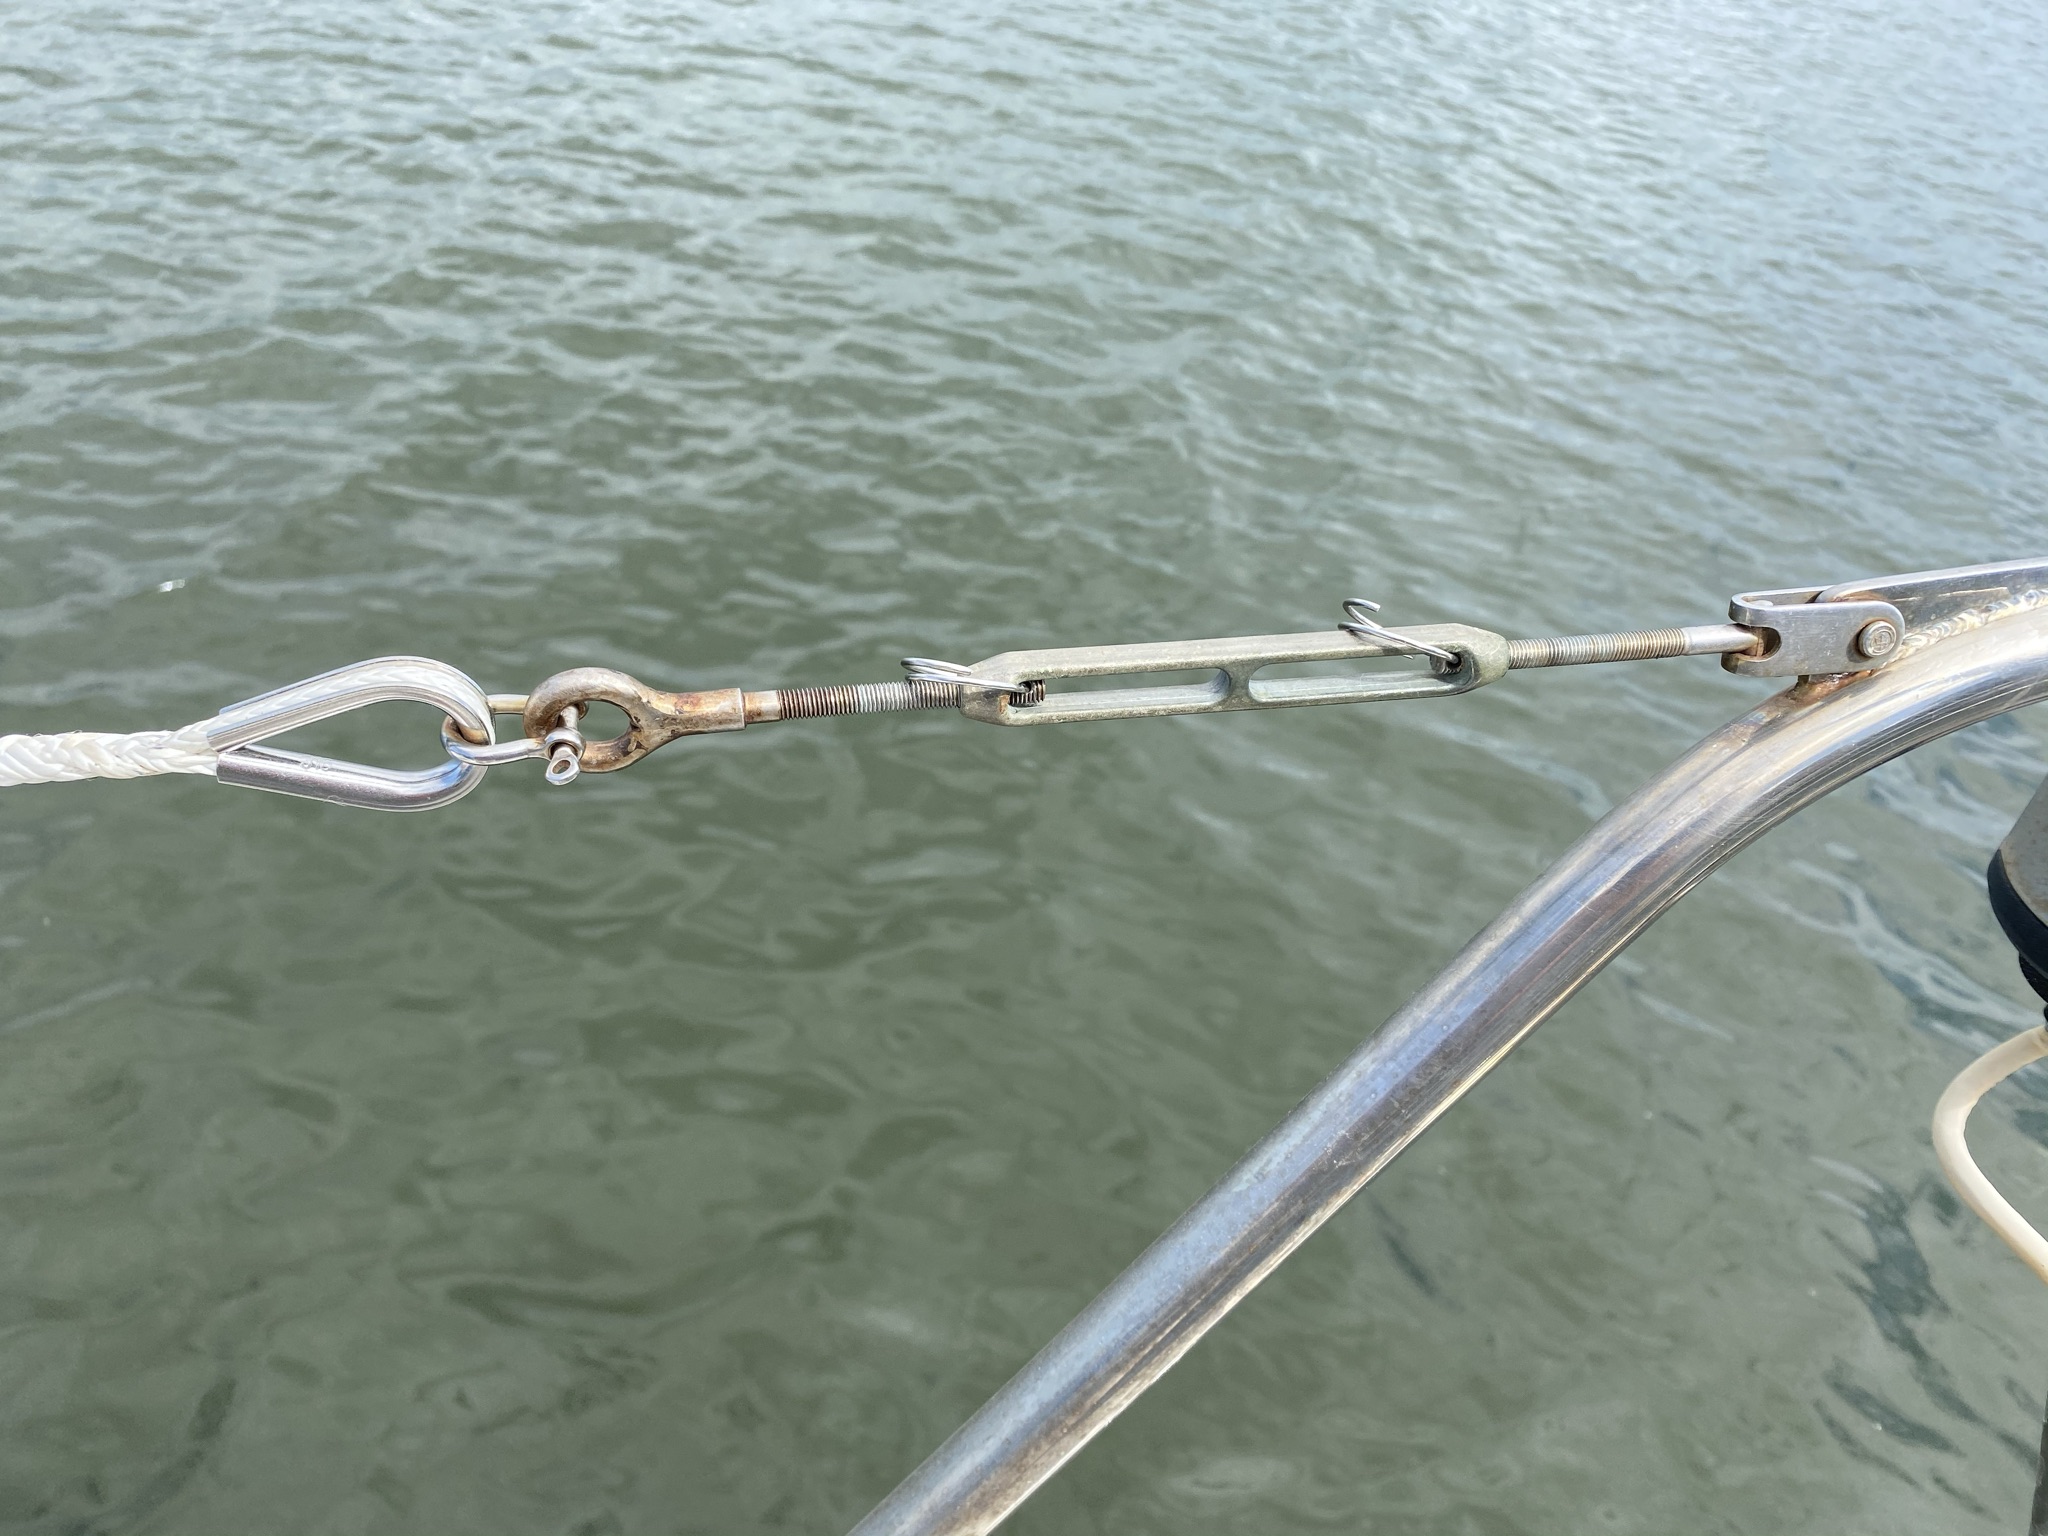
But at this point in my project, I had a thimble that wouldn’t reach the lifeline turnbuckle hardware……

Since I had read a few articles about life line stretch due to the compression of the line under tension (the opposite effect of the line being thickened when the tail is inside or the line is bunched up). I attached a ratchet strap and put the line under tension for a few hours.
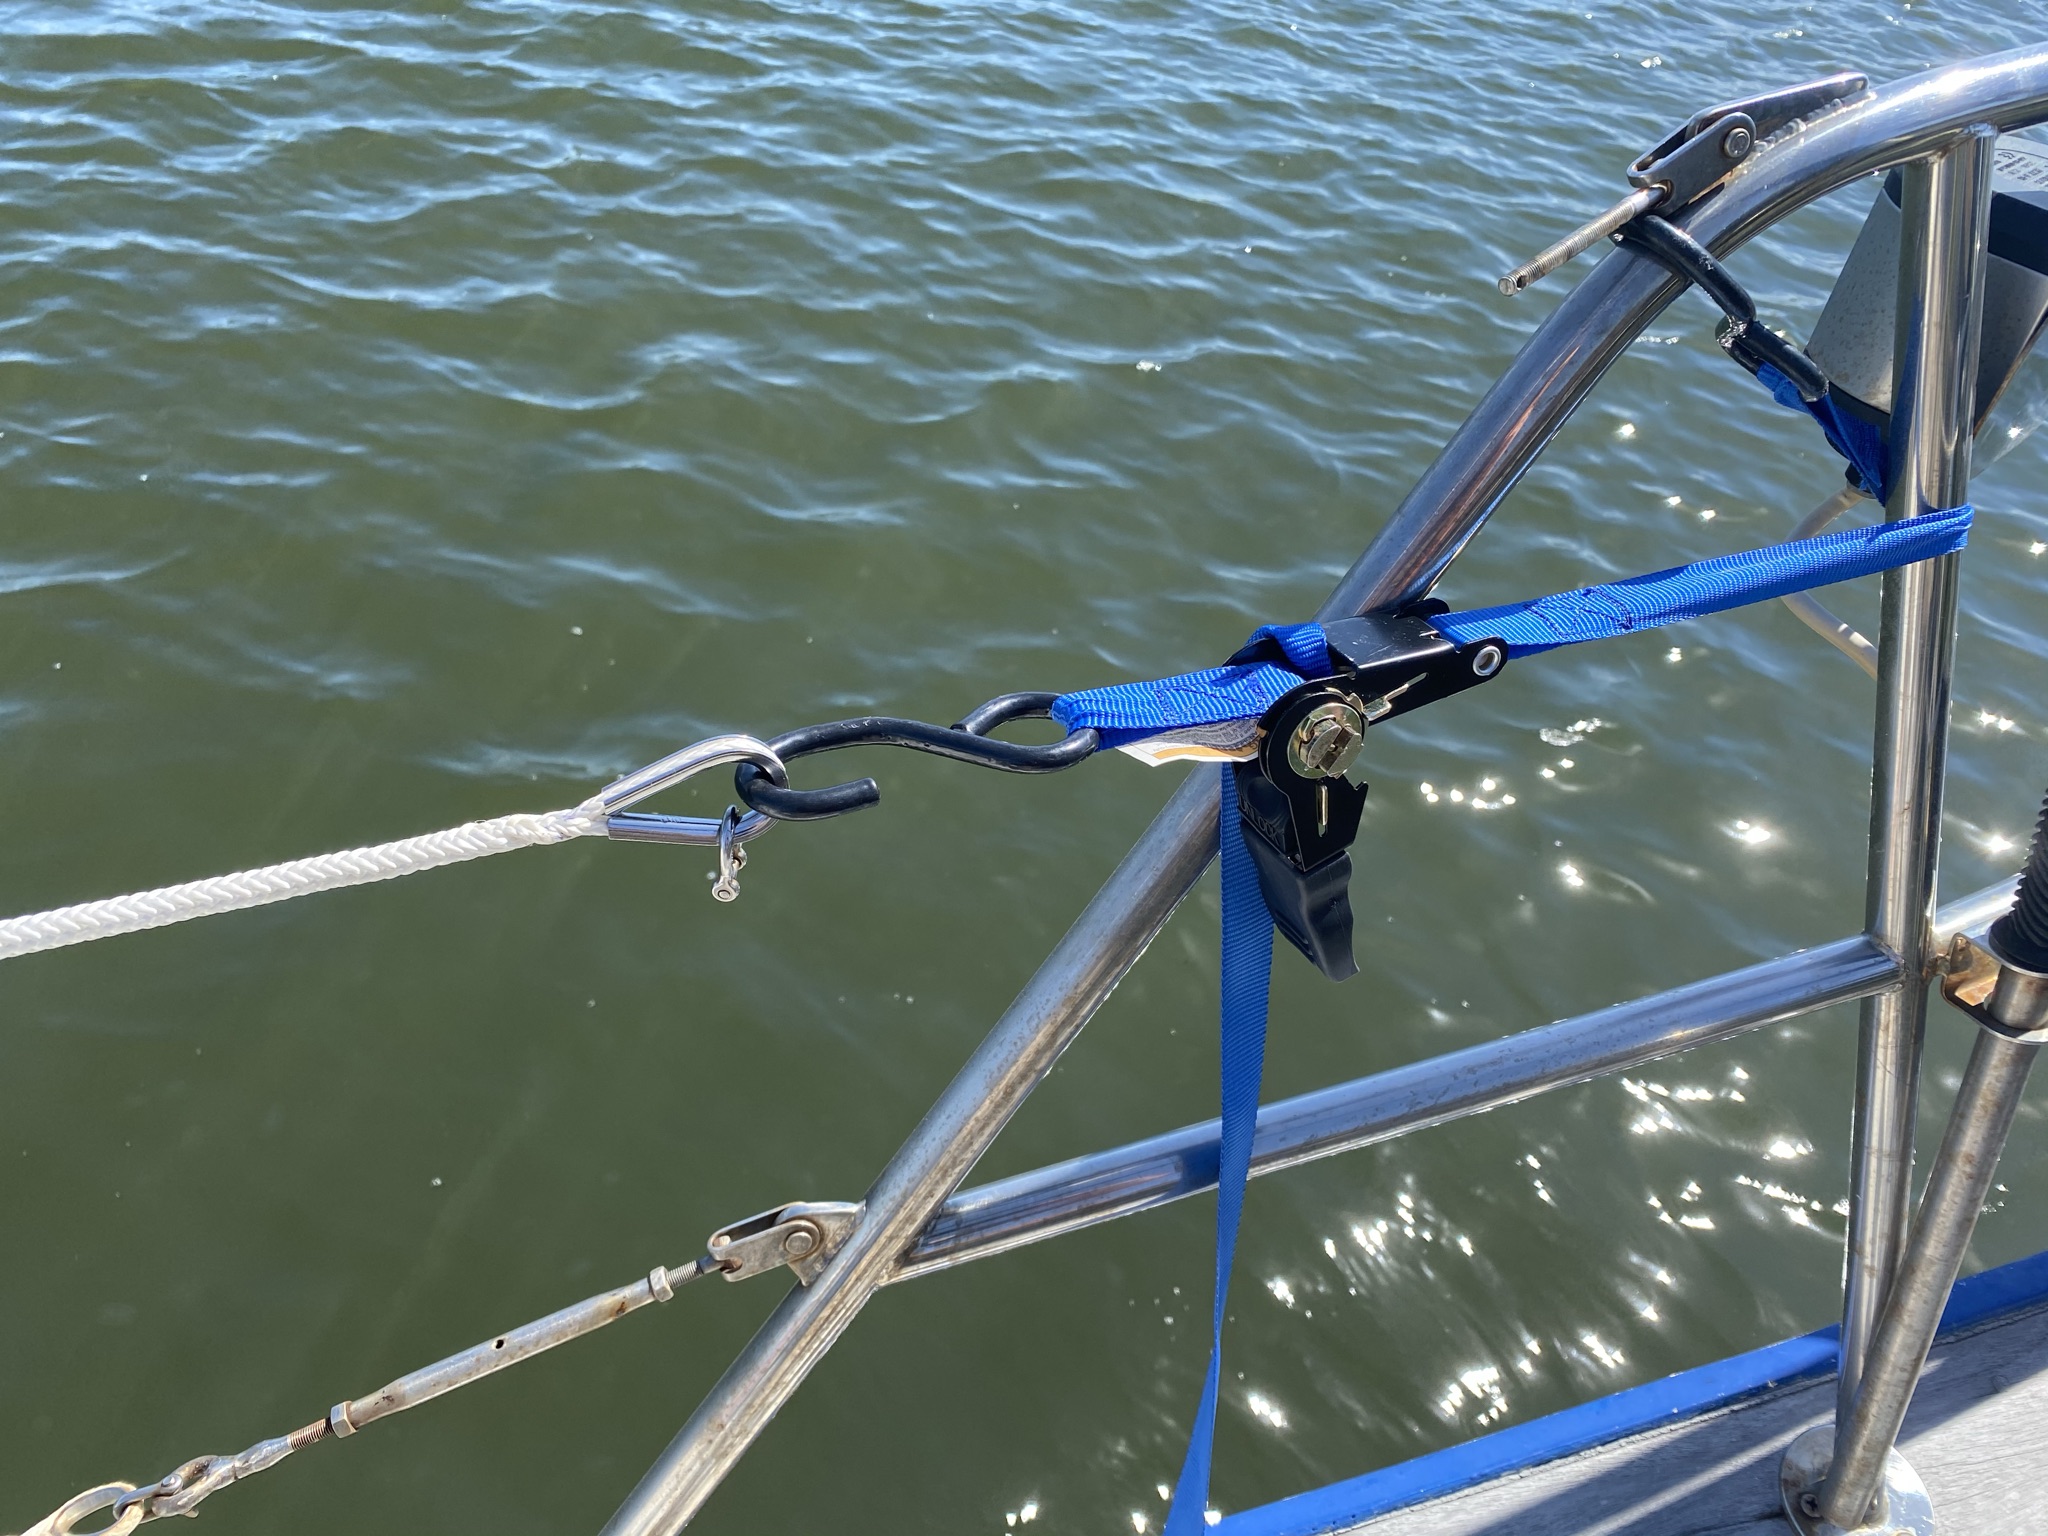
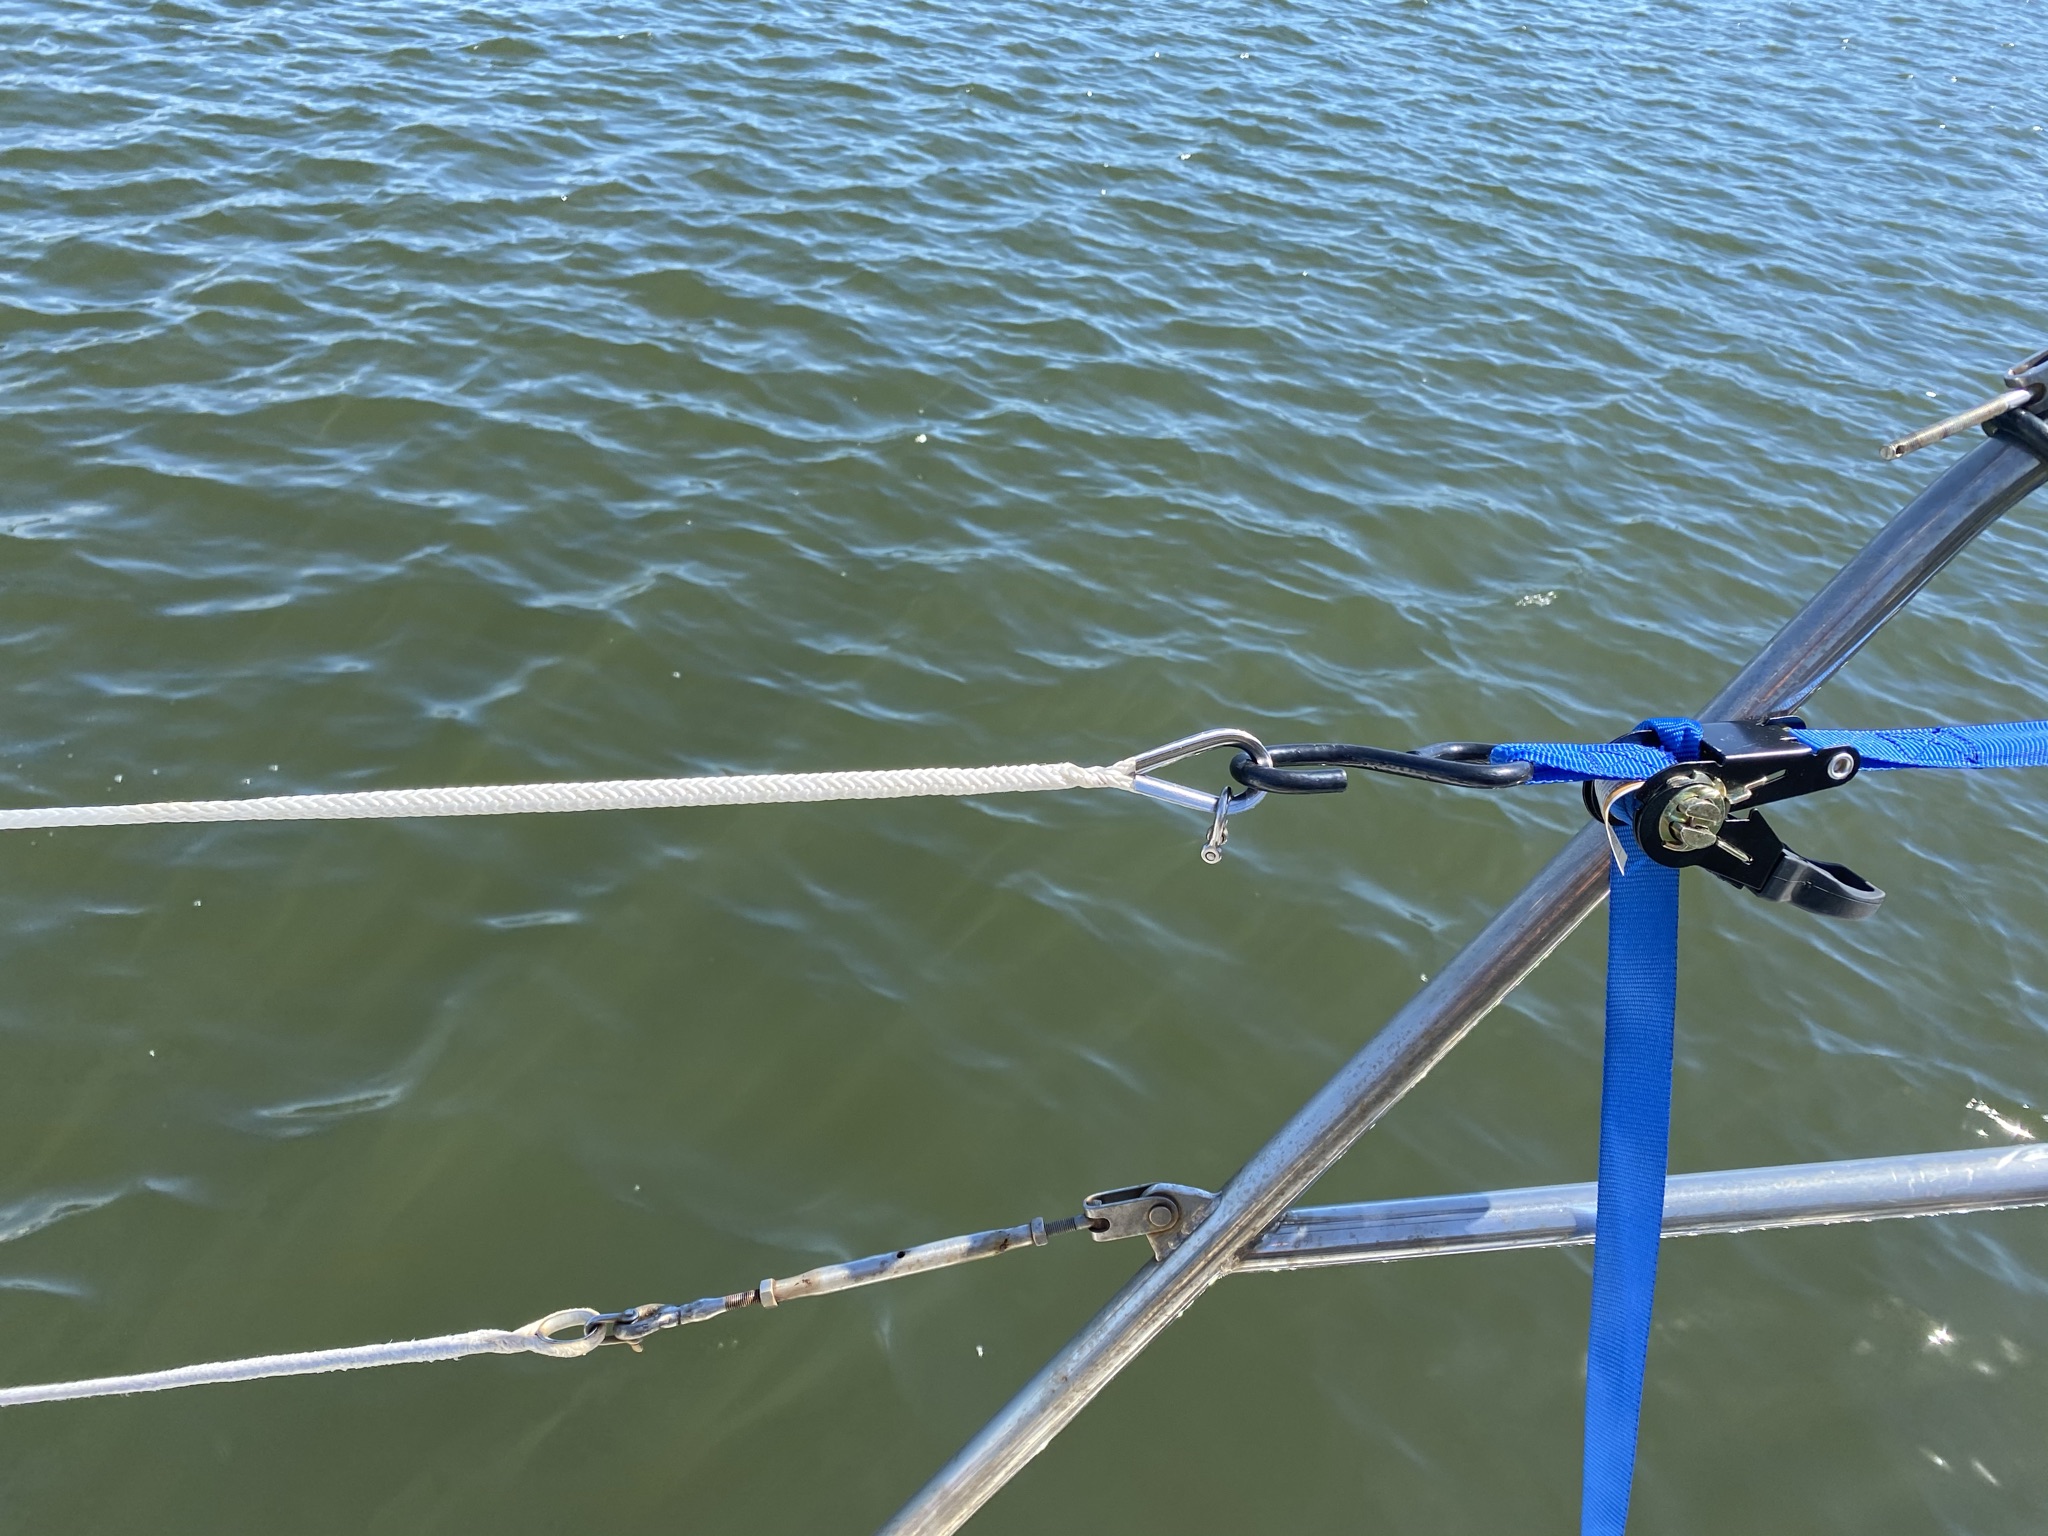
Once the line was compressed it lengthened and the hardware was able to be attached…….don’t judge my hardware too harshly ….stainless polishing is next….

Amazon Physical Gift Card
$10.00 (as of March 16, 2026 00:09 GMT +00:00 - More infoProduct prices and availability are accurate as of the date/time indicated and are subject to change. Any price and availability information displayed on [relevant Amazon Site(s), as applicable] at the time of purchase will apply to the purchase of this product.)
Ring Video Wired Doorbell (newest model), Home or business security, Two-Way Talk, advanced motion detection, HD camera and real-time alerts to monitor your front door (wiring required)
$49.99 (as of March 16, 2026 00:09 GMT +00:00 - More infoProduct prices and availability are accurate as of the date/time indicated and are subject to change. Any price and availability information displayed on [relevant Amazon Site(s), as applicable] at the time of purchase will apply to the purchase of this product.)
blink plus plan with monthly auto-renewal
$11.99 (as of March 16, 2026 00:09 GMT +00:00 - More infoProduct prices and availability are accurate as of the date/time indicated and are subject to change. Any price and availability information displayed on [relevant Amazon Site(s), as applicable] at the time of purchase will apply to the purchase of this product.)
Amazon Echo Show 5 (newest model), Smart display, Designed for Alexa+, 2x the bass and clearer sound, Charcoal
$69.99 (as of March 16, 2026 00:09 GMT +00:00 - More infoProduct prices and availability are accurate as of the date/time indicated and are subject to change. Any price and availability information displayed on [relevant Amazon Site(s), as applicable] at the time of purchase will apply to the purchase of this product.)
Visa Physical Gift Card $100 (plus $5.95 Purchase Fee)
$105.95 (as of March 16, 2026 00:09 GMT +00:00 - More infoProduct prices and availability are accurate as of the date/time indicated and are subject to change. Any price and availability information displayed on [relevant Amazon Site(s), as applicable] at the time of purchase will apply to the purchase of this product.)Auto Amazon Links: No products found.
I admire your ability to splice braided line, Brett. My method is to buy it with the loop already in it. 😎 I’m good with old-school 3-strand, though.
Great job explaining this. I haven’t tried it yet as Doug does them all, but maybe I’ll take a turn at them too.